Thursday, 5 July 2018

Battle Report - Imperial Knights vs Chaos

Hello!

Over the weekend I went to celebrate regular-opponent-John's birthday by beating him at 40k. We played a few games which will be presented as battle reports over my next few posts.

First up, while we waited for others to arrive, we played a small game of around 760 points. I had a superheavy detachment featuring my newly painted Armiger Warglaives and Camulus riding an Errant. He was rocking the warlord trait Cunning Commander and wore the Armour of the Sainted Ion. John took a Renegade Knight with Thermal Cannon and the fist, as well as an Outrider detachment made up of a Lord on a Steed of Slaanesh and 3 units of Chaos Spawn. I forget the mission but it was Maelstrom and largely irrelevant.


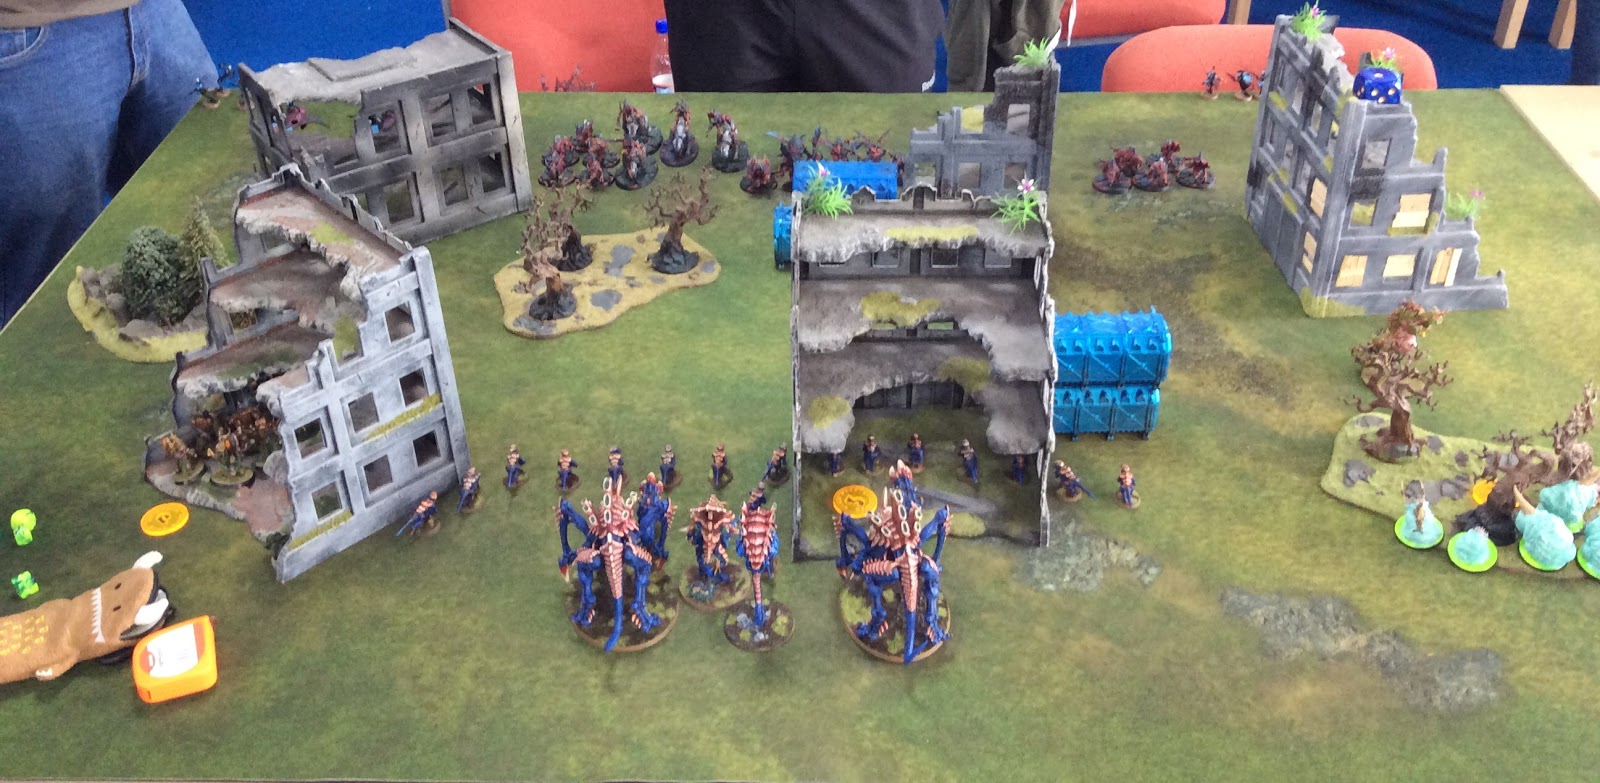
Deployment. John castled up behind a building with most of his force but kept a unit of spawn out on a flank to hold an objective. I deployed roughly centrally. John went first. He moved a bit with some spawn and blasted my rightmost Armiger with the Thermal Cannon, reducing it to just above it's lowest profile.


In my turn I shuffle Camulus and the damaged Armiger around to get firing lines and objectives. (That building the Knight is hiding behind proved surprisingly restrictive for the angle of my knight's approach.) The left Armiger advanced towards the spawn on the objective (I needed to capture it). Fire from it's melta weapons removed one of the spawn, while the rest of my shooting damaged the Renegade Knight.


I paid 2 command points for Full Tilt, but failed a short-ish charge on the Spawn. In response John moved them out to gribble all over my lovely Armiger.


The Knight moved up and got the heavily damaged Armiger in it's sights. Incredibly the plucky little squire survived the blast of the Thermal Cannon!


On the other side of the board the Spawn chipped the paint on the healthy Armiger and lost one of their number for their efforts. I consolidated closer to the objective.


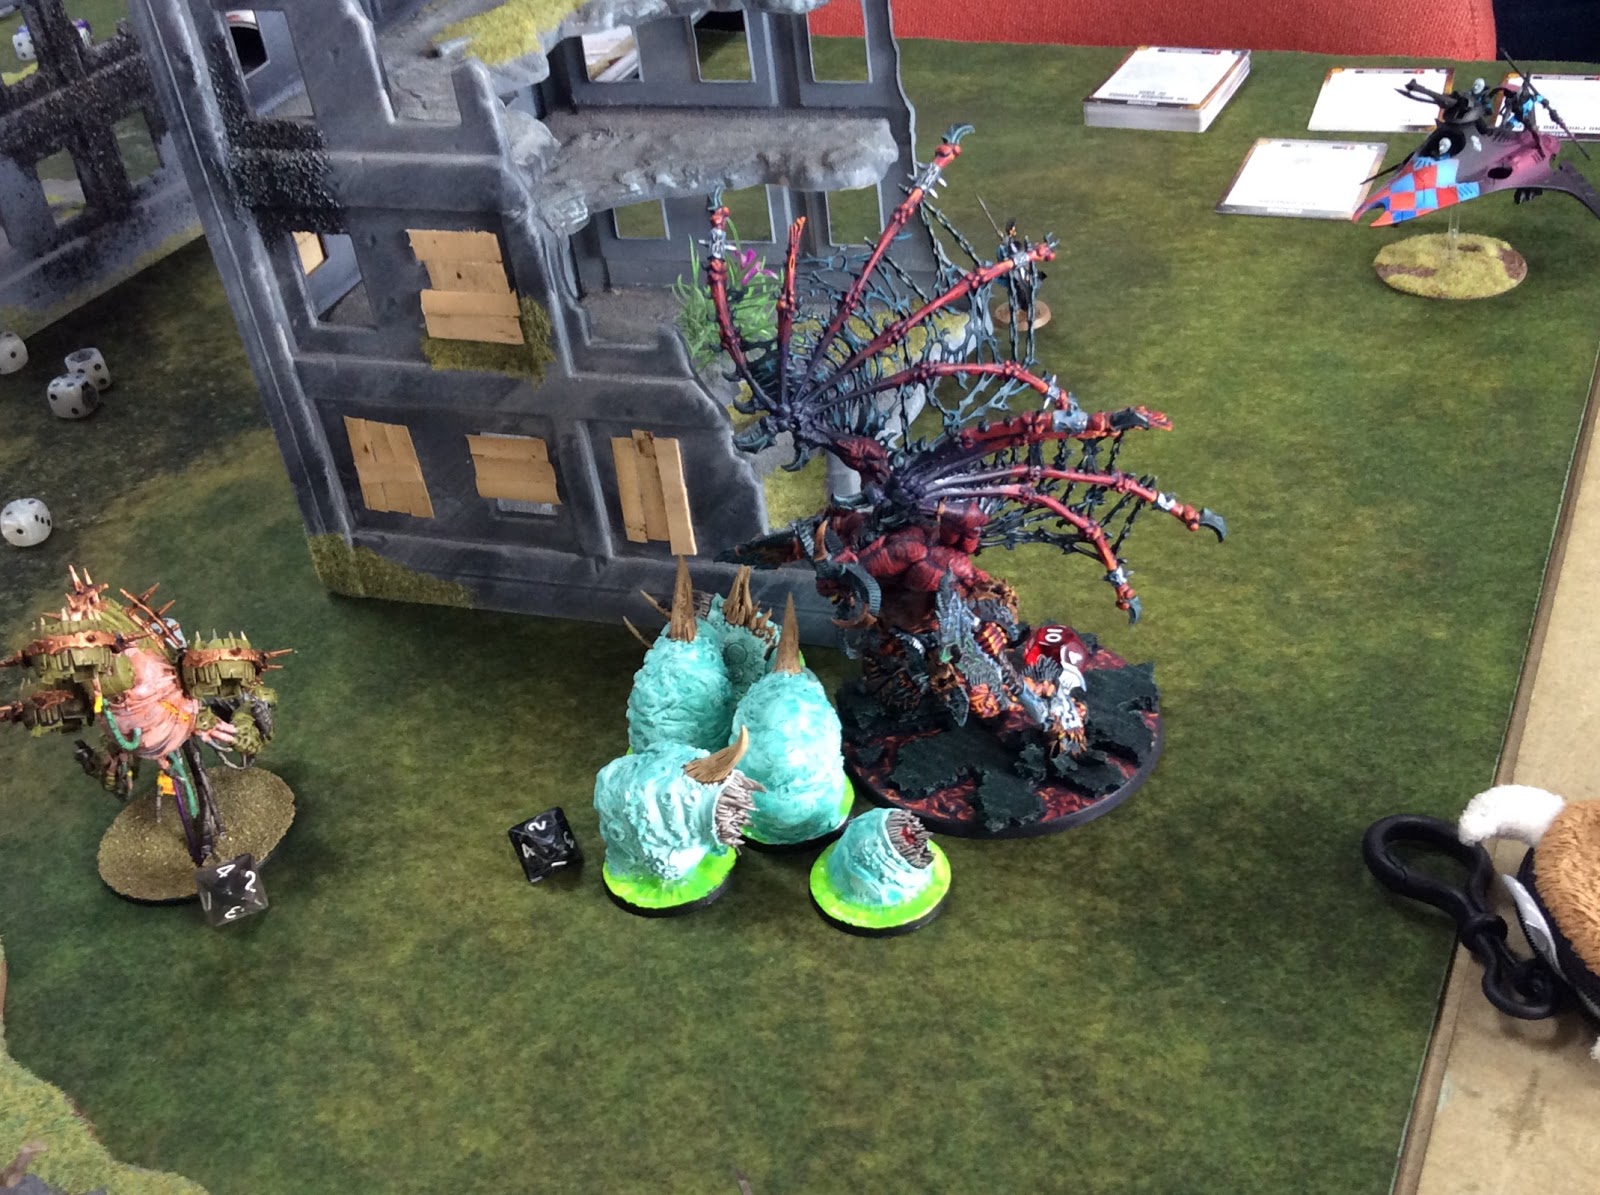
In my turn not much happened. I moved around a bit to hold objectives and took more wounds off the Renegade. I think I killed that one spawn in combat. In John's turn Spawn and the Lord jumped on the smoking Warglaive, while the Renegade switched targets to Camulus himself, with little effect.


The Spawn tore a wound off the Armiger, before the Lord finished it off, but much to John's 'amusement' I played 'Our Darkest Hour' to have him stand back up with 2 wounds remaining.


In my turn Camulus revved his chainsword and charged the traitor knight! A solid hit took down the corrupted war machine, releasing it's sacred machine spirit from it's torment. Elsewhere the Armiger on the flank shot some Spawn, while the Injured one stabbed some.


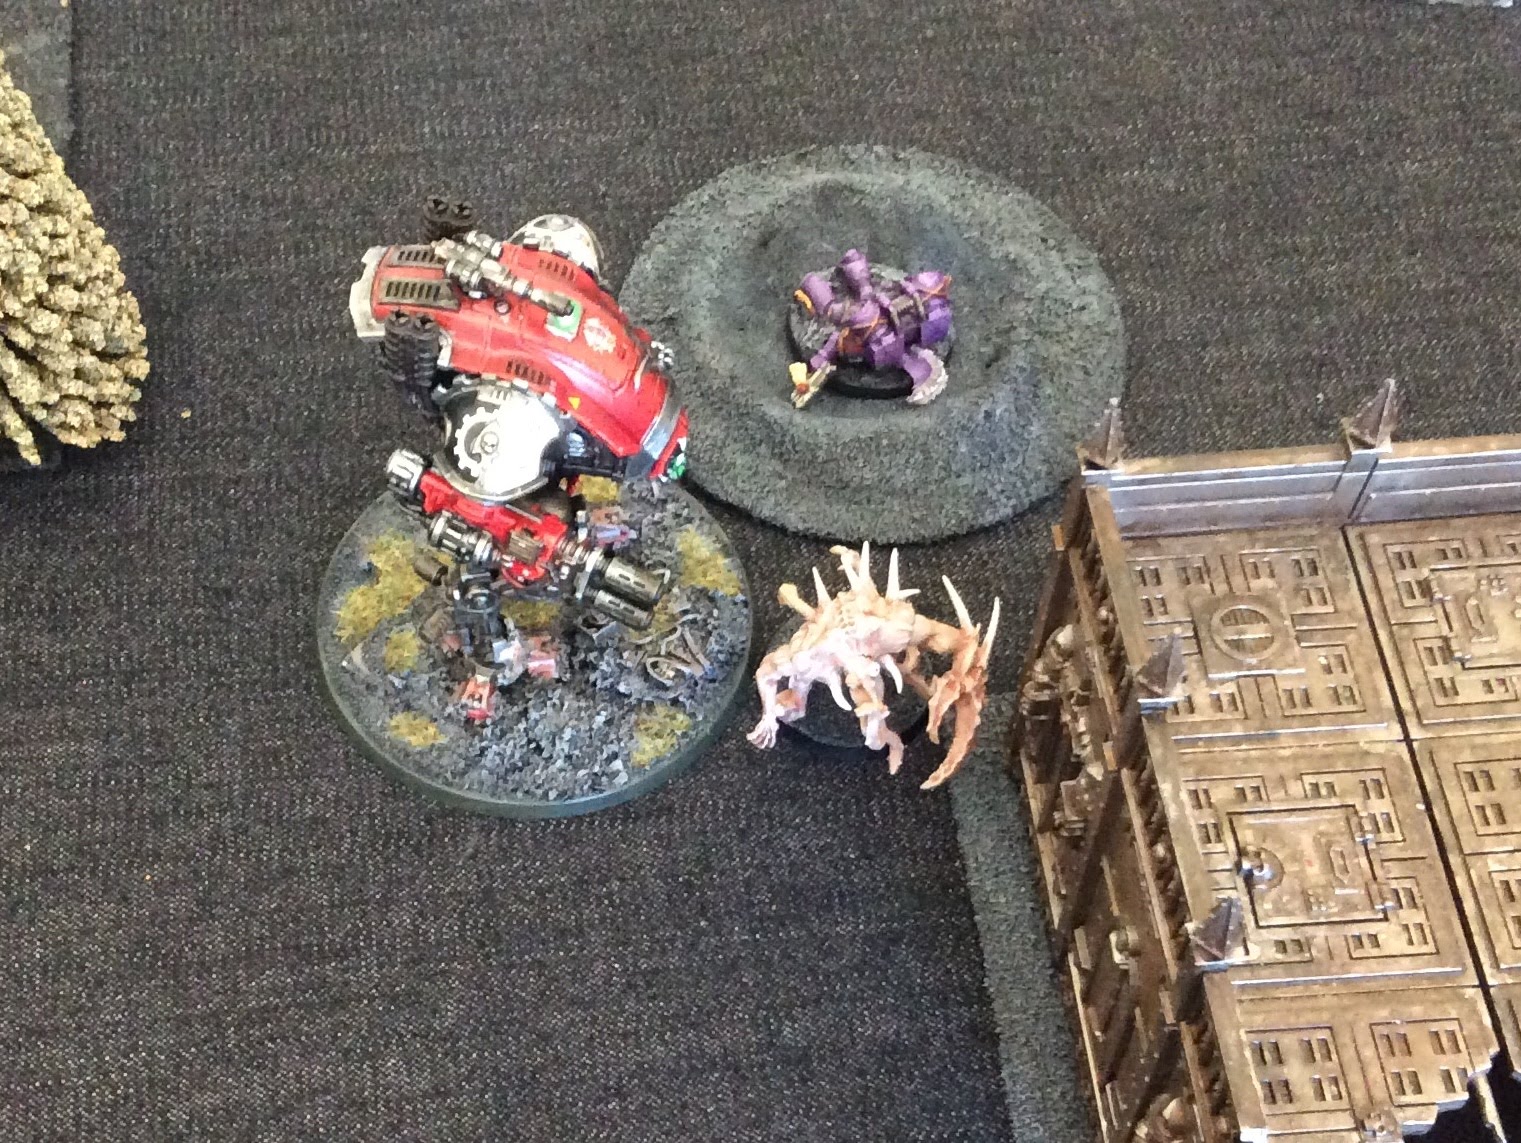
The wounded Warglaive eventually fell, but with the enemy Knight destroyed and most of the Spawn slain, Camulus was able to catch the Chaos Lord lurking by a fallen hero of the Imperium. Forgoing his ranged weapons, he charged into honourable combat, driving his mighty chain blade down through the body of the enemy warlord, making him very, very dead.

With that we called the game. I was ahead on victory points anyway, but John only had a couple of Spawn left and had no real way back. It was a bit of a silly list that John threw together on a whim, so perhaps not the best test of the mettle of House Taranis, but still it was nice for my first game with the new Knight Codex to end in a solid victory. Honour Thy Forge, Honour The Primus Ordinus!

Sunday, 1 July 2018

Tech Priest Enginseer complete!

Hello!

This afternoon I painted up this guy. He’s a pretty cool model but is at a fairly low rung in the ladder of the Adeptus Mechanicus so I didn’t want to paint him up with lots of bling, so I used copper for picking out interesting bits of metal rather than gold. On the other hand it’s not often I sit down to paint a single model so I also wanted to put a bit of effort into making him a bit different. I decided to split his robes into the orange of Ryza and the bone of generic robe colour, and make the divide a cog tooth pattern. I’m pleased with how it turned out, so hopefully it is clearly visible the images below. It’s not super neat but I’m happy with it for an afternoon’s work.


Sunday, 24 June 2018

Armiger Warglaives done!

Hello!

If you’ve been following the blog, you’ll know I’ve just finished my House Taranis Armiger Warglaives. Yay! If you want to go and see WIP stuff you can look here and here. If you want to see the finished minis, you can just look down a few centimetres. Enjoy!


Friday, 22 June 2018

Painting Armigers, step by step, kind of.

Hello!

Been working on those Armiger Warglaives. I thought I’d take photos of them at various stages so you could all see both how I did it and how’s much of a mess my table is. Along the way they will be accompanied by their big, fully painted brother, Camulus Of House Taranis. (Or he might be their uncle or grandfather or something...)


After the first evening of painting I’d given the ‘skeleton’ a few dry brushes and a wash, and whacked some base colours onto the carapace. Nothing fancy, but it’s a start. I know that it’s often recommended to paint the carapace sections separately and glue them on after the dry brushing is done, but I generally prefer to get it all put together so I can see better how it will look.
 

The second evening of painting was spent putting on many thin coats of white and building up the red. I’m using Vallejo paints for most of this, with the red it’s Scarlet Red working up to Bloody Red.


Most of the rest of the painting came yesterday. First steps were to build up the red some more, focusing on edges or raised areas, then do the trim and some of the battle damage. This stage was also the tidy up stage for some of the carapace induced mess. Gunmetal for the block colour of the trim and highlights on the skeleton, then highlights on the trim with a Gunmetal/Silver mix.


That was quite a tedious job so I had to have a cup of tea or two.


Nuln Oil wash applied to recesses in the carapace, the edge of the trim and ends of weapons etc. Final highlights on the red, a lightened Bloody Red around the edges. Also a bit of the ever fun Typhus Corrosion on the exhausts. This all really started to bring the models together for me, and signaled the last few stages.


Transfers on! A bit of matt varnish over them as well, though I’m not sure it was required as I would be using Purity Seal at the end. (I’ve still got the dregs of a can to use up, I know the internet doesn’t seem to like it but it’s consistent with the rest of my Ad Mech.) Next step would be the fun and final bits - painting the base, weathering powders and glowy green bits.


And here they are! All done. Really pleased with them, they match the big knight and I think probably look just a little bit better. I’m going to do a second blog post with more finished pictures, so keep an eye out for that one!


Monday, 18 June 2018

Armiger Warglaives ready for paint

Hello!

I've finally got the Armiger Warglaives from Forgebane built up and ready to paint! Here they are, along with a bonus Tech Priest Enginseer:


These kits were pretty straight forward to put together, and I had some fun with their big bases and some old resin basing kits I dug out. One of the Armigers is completely stock construction, the other has some minor adjustments. I've made the pics below black and white to make the details a little easier to see. 


While posing these guys I tried to get the one on the left to look like he's moving slowly and scanning for targets while the one on the right is striding forward about to swing his chain blade in an upward arc.


Side by side you can hopefully see that the left one has been positioned in a taller, more upright position. No plasticard or green stuff required for this, I simply cut the tabs off the ankle joints so they were just ball and socket and ignored the little bumps that align the legs to the hips in the recommended positions.


The other modification on the Armiger is a load of battle damage. I got the drill and knife out and 'attacked' from a consistent angle, trying to make it look like a concentrated barrage of autocannon shells or similar aiming for the head. Also an excuse to break that bloody railing bit under the top hatch. (Fiddly handles and ladders and stuff are pretty much the reason why I only have one Onager Dunecrawler.) While I had it to hand I also used the drill to drill out the meltagun barrels. Always drill your barrels!


This guy didn't photo well, but here he is anyway. Nice model, and it'll be good to have one that doesn't look suspiciously like a Cybernetica Datasmith with weapon swaps...

Wednesday, 13 June 2018

Double Trouble game 3 - Tyranids and Orks vs Astra Militarum and Chaos Marines

Hello!

This is a battle report from Double Trouble 3 - a 40k doubles tournament with randomised partners every round. Each player has 875 points, making 1750 points a side in total. The missions are all the same, scoring is based on holding objectives at the end of every turn and on the points costs of all the units your side killed at the end of the game. These are scored separately to give totals in Victory Points and Blood Points respectively. For more information, go here.

For the final game my Tyranids (Hive Tyrant, Malanthrope, Termagants, 2 Ripper broods, 2 Tyrannofexes) were teamed up with Ian’s fantastic Mad Max themed Orks, including a Warboss on a bike, boyz in a trukk, a deff rolla battlewagon, 5 rokkit buggies and 5 skorcha trakks. Ian’s army is so full of conversions and kit bashes he entered the entire thing in the conversion competition and scared off anyone else from entering! His battlewagon actually plays music as well so this game was accompanied by a soundtrack.

Our opponents were Greg with some possibly renegade Astra Militarum (Company commander, Psyker, 3 infantry squads, Leman Russ, 2 basilisks, a big unit of Bullgryns and an ogryn bodyguard with a relic for a 2+ invulnerable save) and James with some possibly loyalist Alpha Legion (Daemon Prince, Jump Pack Lord, 3 unit’s of cultists, a small unit of Berserkers and 2 unit’s of Oblitorators.) That’s a lot of bodies, a lot of guns, and a lot of command points! I thought we were definitely up against it in this game, outnumbered and outgunned, and with the corner deployment most of their heavy guns were tucked safely away from us.


Deployment prior to the Berserkers being placed. Oblitorators off the board in the warp somewhere and basilisks right back in the far corner. We made a wedge with the nids as a central blob and Ork mobile units on either flank. The Rokkit buggies were off the board ready to ‘outflank’.


Our turn first and I didn’t have much to do, other than shuffle around and kill a few guardsmen. Acid Sprays we’re out of range and line of sight to the best targets. Ian retroactively scorched some Berserkers after James forgot to place them as forward operatives and they appeared mid turn instead. Ian’s Warboss and boyz charged ahead to fight the biggest, toughest things they could find. The boyz surrounded the invincible Ogryn Bodyguard, using objective secured to grab an objective, but didn’t little else. The Warboss however zoomed head first into the Bullgryns and decapitated two of them (Ian rolled three 6s to wound with the chapter approved relic, then did something like 8 mortal wounds) before getting beaten into the sand by the remainders. Epic! Thanks to backfield rippers and aggressive Orks we got 4 objectives this turn.


Retaliatory fire was relatively acceptable, Ian losing a few wounds off his trukk and battlewagon. On our flank the Prince and Berserkers charged the Skorchas, killing all but one. Bullgryns moves up and charged into my Termagants, who were not properly screening as they had to move out of the way of the Warboss. Pile in caught one of the Tyrannofexes in melee. This was a real problem. Elsewhere the   Ogryn and some cultists failed to dislodge the Boyz and take the objective.

   
In our turn the Battlewagon moved up to charge in and cause mayhem. Rokkit buggies appeared to shoot the Russ, but were relatively ineffective. I disengaged from the Bullgryns and targeted them with a stationary Tyrannofex, only succeeding in melting one that was already injured. The Tyrant and the Malanthrope moved in to charge, but both whiffed and didn’t kill any of them! This was real bad! We still scored 4 objectives this turn though thanks to the boyz refusing to die. 


Missed a turn with the photos here. James brought the Oblitorators down on our flanks, had some good rolls to kill 4 out of 5 Rokkit buggies with them, and put some wounds on one of the Tyrannofexes. Combined with a barrage from the basilisks the Fex was down to 1 wound. Other shooting dropped Ian to just a damaged trukk on an objective, the last remaining boyz finally squashed by the Ogryn. James tried to Warp time the Prince over to help the Bullgryns but I denied with a double 6, forcing him to only kill some Termagants. This allowed the Hive Tyrant to counter attack and kill the Bullgryns before they could strike and finish off the Malanthrope.

In our turn we found that James had made a bit of an error as the Oblitorators were just within 18 inches of the stationary Tyrannofex on 1 wound. They melted. The other Tyrannofex cleared some guardsmen or cultists and thanks to an 11 super smite, the Tyrant beat up the Daemon Prince.


Artillery fire finally killed off the wounded Tyrannofex, while the second Oblitorators unit with the Lord next to them moved into position to kill the second fex. However James’ dice absolutely abandoned him and left it on a couple of wounds remaining. The Ogryn charged and killed the Malanthrope. 


The last couple of turns are a bit of a blur. The Tyrannofex manages to melt all but one Oblitorators, Ian’s surviving trukk put 3 Wounds on the lord with a Rokkit to the face. The wounded Tyrannofexes took an entire shooting phase of big guns but thanks to the Jormungandr adaptation refused to die, even to the Ogryn in melee.


The Tyrannofex did eventually fall in the last turn as James and Greg were running for objectives and killing off Ripper Swarms to take them. The Tyrant killed off cultists and the psyker in our last turn, ending on an objective. Ian and I finished with one model remaining each but we had done some good damage and racked up a fair few points along the way. 16 victory points and 917 blood points for us, 17 and 1523 for them. A bit of a battering but a fun game and a good example of how tough those Tyranids can be, even though the Tyrannofexes fell eventually, they took an awful lot of firepower.


My scorecard and final results! 11 out of 31 in the combined scores, not bad! Just pipped to the top 10 by Greg, probably the difference in killing that last Oblitorator or another guard squad. I climb a few more places if you only consider Blood Points, which was my original goal with building this list - just kill stuff!

I’ll repeat what I’ve said before, I had a great time. All the games were a lot of fun and all my partners and opponents were good eggs, as far as I can tell. The event was very well run and if there were another one, say on September the 1st, I would definitely try to get to it!

Tuesday, 12 June 2018

Double Trouble game 2 - Tyranids and Death Guard vs Harlequins and Daemons

Hello!

This is a battle report from Double Trouble 3 - a 40k doubles tournament with randomised partners every round. Each player has 875 points, making 1750 points a side in total. The missions are all the same, scoring is based on holding objectives at the end of every turn and on the points costs of all the units your side killed at the end of the game. These are scored separately to give totals in Victory Points and Blood Points respectively. For more information, go here.

In round 2 the Tyranids (Hive Tyrant, Malanthrope, Termagants, 2 lots of Ripper Swarms, 2 Tyrannofexes) were assigned Duncan's Death Guard, made up of Typhus, a unit of Plague Marines with blight launchers and assorted melee weapons, a Blight-Hauler, a Bloat-Drone with the fleshmower and a sizable unit of chaos spawn. Team bio-hazard then!

On the other side of the table Ian's Harlequins (2 Troupe Masters, A Solitaire, 3 Troupes and 3 Starweavers) teamed up with Luke's Khorne Daemons (Karanak and Skarbrand leading multiple Flesh Hound packs, Furies and Bloodcrushers.) Both rather striking looking forces, with a fast moving melee focus. Duncan and I definitely wanted them to come to us. In a rare event for 8th edition, Ian and Luke won the roll off and elected to go second.


Deployment was largely based around covering objectives with a solid Tyranid block in the centre and speedier Death Guard elements on the flanks. It's an odd day when Nurgle is the fast part of the army.


Our first turn involved a little shuffling and some odd shooting with what little guns were in range. Moving swiftly on...


The Bloat-Drone proved a tempting target for some hounds and Harlequins along with their Troupe Master.


Luke moved his blob of fast moving assault daemons up the centre, wisely keeping them 18 inches from my closest Tyrannofex.


Flesh Hounds and the Harlequin Troupe make it into the Bloat-drone, but the Troupe Master fails to get in. Even with his rerolls to wound the Bloat-drone survives more or less intact.


On the left flank more Hounds charged into the Blight-hauler. Another Harlequin troupe tried to charge in first but even ignoring the terrain with their flip-belts they couldn't make the distance. Ian's dice were not giving him much help at this stage!

Our turn was successful in terms of killing things, but we didn't move much. I shuffled forwards to get the Acid Sprays in range, and melted some daemons, including all the Bloodcrushers. I also had the Rippers dig up behind our lines to deny Skarbrand a nice landing spot and hold an objective. On the left flank not much happened, while on the right Typhus materialised, destroying the Troupe with psychic powers before failing to charge the Master. The Bloat-Drone and charging Spawn made short work of the Hounds.


Luke's remaining central force closed onto the Termagant screen, looking to take out objective secured units and tie up my monsters via pile in.


The left flank was turning into a slapfest with the Hounds and Blight-Hauler unable to do much to each other, and the Plague Marines and Harlequins getting stuck in with each other as well.


Ian's Solitaire came from nowhere with a Blitz move through terrain to get a charge off on my warlord Malanthrope, causing enough wounds to kill it off and pile in to the Tyrant and a Tyrannofex to try and stop them shooting. The Termagant screen held firm however, keeping the Furies and Karanak from piling in to my monsters. 


On the right flank Skarbrand appeared and took the fight to the Chaos Spawn,who I think managed to put 6 wounds on him after interrupting. You don’t see Spawn that much but they are pretty strong! He murderated his way through them, leaving one badly wounded survivor. 


In our turn a successful Smite from the Hive Tyrant killed off the Solitaire, leaving both the stationary Acid fexes to fire at full effect. Karanak and the Furies were turned into daemon-goo. The Termagants moved up towards an objective and a unit of Harlequins that were still embarked on their transport.


Duncan combined some psychic powers and stratagems to deadly effect, allowing Typhus, the Bloat-Drone and the last remaining spawn to kill off Skarband. First time I've seen the chaos familiar stratagem used in a game. I should remember it exists in future!


With time ticking, Ian focused on claiming objectives. One of his remaining Star Weavers moved up to shoot, then charge the Ripper swarms (who, lets remember, are toughness 3 with a 6+ save and leadership 4) but his dice betrayed him again and they all survived. The Starweaver would promptly be killed by Duncan's forces in the next turn. Elsewhere the other Starweavers did minimal damage to the Hive Tyrant.


My forces moved up, melting a Starweaver and most of it's occupants. I tried to advance Termagants onto an objective but they didn't run fast enough. The melee on the left flank eventually ended with a couple of hounds and some Harlies left hiding from the Tyrannofexes. On the right the Bloat-Drone chased down the Troupe Master that had run away from Typhus and aimed to find out 'will it blend?'. Apparently yes.

With about 5 minutes left at the end of turn 4 we decided to 'play' a further turn with the agreement that no one moves or shoots anything, so that we'd each get a bonus 3 victory points, and the game ended there. Luke and Ian were definitely up against it in this game but Ian played especially cautiously, which paid off as the Harlequins still had a number of assets left to hold objectives after initially looking like a tabling might have been on the cards. This paid off for them, just pipping us at 16 victory points to 15. Not so much with the blood points however, as Duncan and I picked up 1398 to their 742.

Another fun game, played in great spirit. This Tyranid force was proving very tough still, even though the Malanthrope spore cloud and the Jormungandr adaptation provided very little assistance in this one. I was also noticing that I was fairly command point independent - Duncan used the vast majority of ours in this game to good effect while my Tyrannofexes just melted everything they could get close to without having to use any stratagems on them.