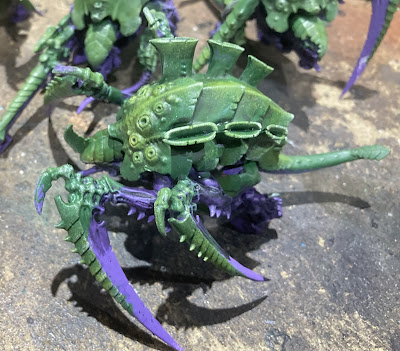
Just a quick one - I thought I'd do a bit of a mini tutorial on how I do my sponging, as seen on two Death Guard projects from last year, assorted other bits, and most recently the green and purple Tyranid commission. It's not a miracle method to instantly paint all models, but it is a fun alternative to drybrushing if you want a slightly less controlled and more textured look. I don't know if there are people out there who maybe don't know quite what I mean when I say I'm sponging something, or maybe there are those who just want a little persuasion to give it a go - either way here's a little run down of the method I use.
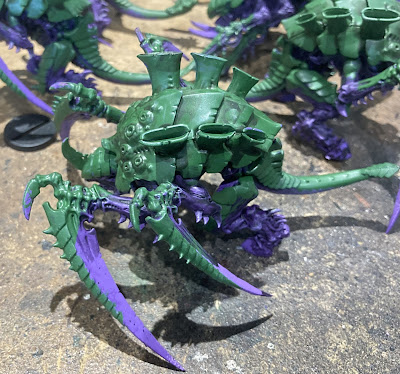
Here's the starting point for this miniature. Base colours are on and a bit of shading, ready for a highlight layer on that green. Note that you can easily do this the other way around - sponge on a lighter layer over a base coat and then apply a contrast paint or wash over for a more muted effect. In this case we are going to be sponging on some light green over the carapace etc.
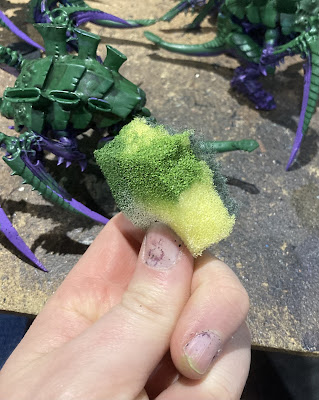
Here's the sponge I'm using - it's about a quarter of a cheap sponge scourer from a Tesco multipack. As you can see I've loaded up a corner or edge with paint - much like drybrushing you can vary the amount depending on how strong of a highlight you want, I find there is usually a sweet spot that is a little bit wetter than an equivalent drybrushing would want. You can also see that I've used this bit of sponge before on the far side - you can use the same area once it's dried multiple times, eventually it'll clog up and become hard to use but you don't have to throw it away after each use.
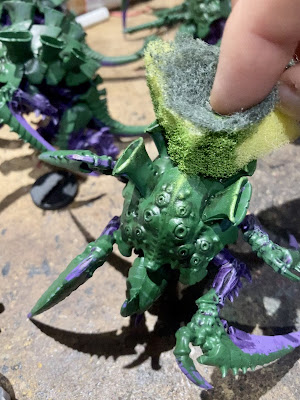
Here's the actual sponging in action - simply dab the slightly wet sponge over the areas you want to highlight, applying more or less pressure depending on the desired effect. Too wet and too much pressure will just paint a big blob onto your model so you will want a certain amount of restraint, but with a bit of a dryer sponge you can really go ham at the model if you want! With these sponges the scourer pad also provides a nice easy bit to hold on to which is nice - I've used sections of packing foam instead to get smaller areas but it is a bit harder without a firm section to grip.
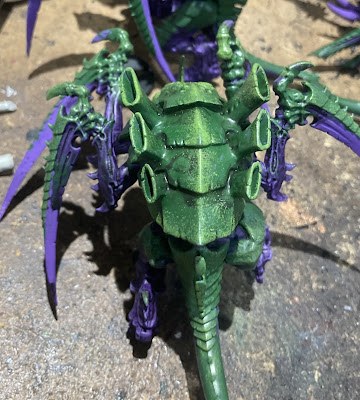
Here's the result after the green sections were sponged - I went back over once it was dry with a bone colour for another highlight layer with less paint on the sponge and a lighter touch. As you can see it produces a mottled, natural looking effect which really suits this kind of model. It also works great for chipped paint or flecks of rust etc.
I don't claim to be an expert by any means, but this is something I've been enjoying and it gives a nice effect, I definitely think it's worth giving a try, if only just to have another painting tool in the box. Hope you enjoyed this little guide, thanks for reading and stay safe.
No comments:
Post a Comment
Due to spam messages I’m trying to use the comment moderation system. Hopefully this works!