Wednesday 29 December 2021

Adeptus Titanicus Battle Report - Mortis vs Magna, Battle for Pad 13

Hello!

Another Titanicus game with The Claw, continuing our little narrative of the traitor Legios fighting for the spoils of Esteban V, as the Warmaster's gaze turns towards Terra. Mortis and Magna have been trading blows in the first three encounters (click for game one, two and three), so perhaps at the battle around this lone, but vital space port one side can land the killing blow?


We decided on a nice size of 1750 points, and a simple objective of whoever had the most stuff (by scale) of units touching the landing pad square at the end of the random game length would win. As it's a landing zone the terrain was fairly light in terms of completely blocking stuff, but there were plenty of little structures to grab some cover here and there.


I took a classic Axiom maniple, with the standard loadout Warlord as the Pitiless Princeps Seniors, a Reaver loaded out for shield stripping, a melee Reaver and Warhounds with double turbo lasers and double flamers. I rounded out the points with a trio of Questoris Knights. This felt very Mortis-y, the plan being to strip shields and feed engine kills to the Warlord.


The Claw took the Fortis maniple again with a Warlord swapping a volcano for a Quake cannon, a pair of mixed load out Reavers, and supported by a bunch of knights- six Questoris and four Cerastus Knight Lancers.

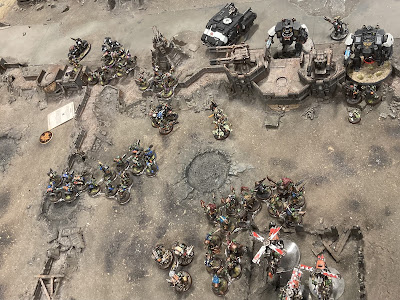
The forces lined up against each other, with Warlords pretty much central and faster elements on the flanks. Turn one initiative went to Mortis.


I decided those Lancers were a bit pokey and needed to go. As my last movement action I pointed the Warlord at them. One good blast with the Belicosa Volcano Cannon and all four evaporated before the second gun or the missiles could fire! New model syndrome in full effect for The Claw.


At the end of turn one, not a lot of damage elsewhere (I think I passed every single void shield roll this turn!), leaving the Mortis forces in the ascendancy - keeping the initiative for turn two.


Turn two and the forces started to converge on the centre. The Questoris Knight banner on the Magna side made a charge into my melee Reaver, losing one to the chain fist before hacking away at the legs. The Inferno gun Warhound got some shots in to little effect, and ended up eating melta cannon from a Magna Reaver, getting immobilised away from the main fight. The Magna Warlord took some punishment to it's shields but no serious damage yet. Since they were still moving into position it was unable to share shields with it's maniple.


Turn three and initiative to Magna. The Knights cut into the Reaver to disable it, leaving it a standing wreck. My inferno Warhound continued to suffer with emergency repairs failing to get it moving again. My left flank had collapsed, but the right was still pretty strong, Knights and Warhound moving in to be annoying and the shooty Reaver and Warlord still undamaged, pouring fire into the Magna Warlord, causing critical leg damage and getting it to spin away from the objective.


Turn four, the Magna Warlord made it's move onto the middle, reigniting it's shields in defiance. Mortis aligned Knights ran in to cause a nuisance of themselves. The Reavers moved around into closer positions, though the Magna one immediately behind the Warlord succumbed to the Machine Spirit and marched towards my badly damage Warhound.


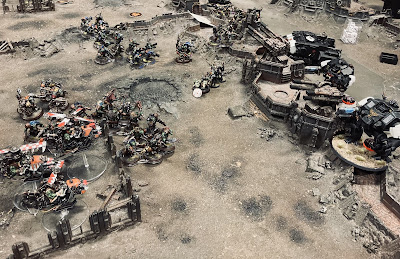
All eyes on the centre, the other Reaver moved into position behind the Magna Warlord and their Knights engaged my Reaver. Once again the shields went down on the enemy Warlord but my Volcano cannons scattered and were unable to get the finishing blow. Random game length was rolled, and we went into turn five, with Magna stubbornly holding onto the objective.


In turn five, knights fought knights, Reavers blasted Warhound, and the Warlord swayed the wrong direction, repaired shields once more, then stood it's ground. Finally the Fortis Maniple was able to share it's shields and this was just about enough to hold off the firepower of the Reaver and Warlord - I think they ended up with two points of void shields between them.

Once again, random game length rolled, and this time it was game over. With the crippled Warlord hanging on just by the skin of it's allies void shields, Legio Magna picked up the win.

Another fun outing for AdTit. It's always a lovely looking game for me when there's a fully painted board and two painted forces, and it was awesomely cinematic to see all these big stompy robots converge on a central space that they absolutely had no right all trying to fit into! After that game our little narrative sits at two wins apiece, so I think sometime in the new year we will have to have a decider! 

Anyway, thanks for reading, hope you enjoyed, and stay safe!

Wednesday 22 December 2021

Grim Dice 40k Tournament Report (Dec 21) - Ork Green Tide

Hello!

Time for a bit of matched play with a little one day tournament over at Grim Dice Tabletop Gaming in Grimsby. The event was billed as beginner friendly, with everyone getting the 10 points for painted regardless of actual painting. This meant that some people were taking some slightly silly lists or new armies which was a bit of fun. Personally I prefer to only play with painted models but it's nice to see a bit of variety in the style of events being run.

Anyway, I was running a variant of my Green Tide Snakebite list, toned down a bit in terms of boyz units to give me a better chance of getting through the games, and giving a bit of target variety if I came up against some newer players with an army that might struggle against just Boyz. To that end I put some Meganobz in there, and brought the KFF Big Mek as well to give him another go and see if I could get some extra survivability our of the Boyz. With the extra patrol and a bonus relic and trait the list starts with 8 CP.

Snakebite Battalion and Patrol

HQ: Warboss (kombi skorcha, powerklaw, Brutal but Kunnin, Super Cybork Body), Warboss (kustom shoota, big choppa, Headwoppa's Killchoppa, 'Ard as Nails), Weirdboy (Warpath, Da Jump), Weirdboy (Fists of Gork, Jabbin Fingers), Big Mek with Kustom Force Field

Troops: 4x 15 Boyz (powerklaw), 2x 11 Gretchin ('Orrible Gits), 15 Beastsnagga Boyz

Elites: 5 Meganobz (2 kombi skorchas), 15 Kommandos (Powerklaw, bomb squig, distraction grot)

Fast Attack: 2x 3 Deffkoptas, 5 Stormboyz (Powerklaw)

I'll not do a full report for each game, just a quick summary, partly because it was quite a lot of 40k crammed into the day and I'm not sure I can remember it all, and partly because I don't want to spend all week writing this!

Anyway, game one was against Rick and his Orks! Green on green is always a good laugh, so it was a good way to start off. It was Rick's first tournament, but he obviously knows the game as his list was quite a scary (and great looking) Speed Freaks/Freebootas combo! A whole load of buggies and bikers, plus a Boomer Gunwagon and a pair of jets - Dakka and Wazbomb. Having been on the receiving end of Tony's Deffskulls Speed Waaagh! I was prepared for this one to hurt! The mission was Scorched Earth, and the Snakebites got turn one...


I was quite lucky to get turn one charges from the Kommandos and the Jumping Meganobz, which did some damage and forced a response. I took some heavy casualties in the turn one and two shooting phases, but though I lost a lot of Boyz the Beastsnaggas powered up and killed the wagon and a some buggies, and we discovered that Warbosses are really good a beating up buggies - hitting one 2s, wounding on 2s with their x2 strength weapons and ignoring ramshackle. Ultimately I was able to take board control and the win, leaving just the planes flying around to wrack up some extra points for the Speed Freaks. Here's the score card:


So, sitting on 95 points put me on table two against Jack and his Drukhari. He was running what might be described as an 'old meta' list, running plenty of Wyches, Incubi and a Trueborn squad in Raiders and three killer characters, Drazhar (master of blades) and beefed up Succubus and Archon. Hellions, Reavers, Scourges and some Venoms meant there was plenty of mobility and a Ravager rounded out with a big more dark light shooting. The list had obviously taken some hits in the balance update but it still had a lot of stuff in it! The mission was Overrun, and I once again got first turn.


This felt like one of those 'it was close until it wasn't' games. Once again the Kommandos got a turn one charge to put on early pressure, and the Boyz gave me some good early board control. The Snakebite transhuman-lite along with T5 proved very good for me, causing some of the Drukhari melee units to underperform. The big shift happend in Drukhari turn two when Wyches, Incubi and some killer characters got into two of my basically full strength boyz units at once, making them both fight last. It was a big mistake on my part, I should have used one unit to screen the other from charges. I also got a bit lazy with screening in the back, as you can see my squig was staring daggers at the Scourges who found a gap to pop in and do nasty things to Grots. I'll also say that after this game I'm totally behind 12 point Wyches. Their 4+ in combat and assorted drugs mean the just survive much better in melee than T3 suggests - Redtoof was unable to clear a unit of 5 off an objective even with Brutal but Kunnin.


Scorecard. As you can see, not very close at the end, but not a total blank on the score. In this game I absolutely missed the shootas that I would normally take instead of the Meganobz, their overwatch could have been critical in a few places and having more bodies would have helped massively.

So going on to game three with a win and a loss, I drew against Sam and his Tau. While the last couple of games were against generally strong 'meta' lists, this one was absolutely a hard counter to me. His list had a smattering of infantry and markerlight support, some Stealth Suits, a big unit of Crisis Suits all with burst cannons, a Coldstar with all burst cannons, and the Ta'unar Supremacy suit! That's a lot of strength 5 multi shot firepower, and strength 8+ blast on the big suit. The mission was Sweep and Clear, and the Tau got first turn. Gup!


I think after the first shooting phase it was pretty clear how this game was going to go, as I lost about a third of my army, while the Tau were still several turns of movement away. I think I played reasonably well to salvage some decent points, and I rode my luck in places - notably the Meganobz Jumped onto the central objective on my turn one and somehow one of them survived the entire Tau shooting phase. I also failed a few key charges though which could have made it more interesting. I was particularly pleased with myself on the turn the first Kopta unit arrived and I successfully baited Sam into not firing overwatch from the battlesuits - making it look like the Deffkoptas were going to charge them while declaring into their supporting units with my other Orks and then at the last moment declaring the charge on Stealth Suits in the opposite direction. Kunnin!


So here's the scorecard, I think the result was pretty inevitable but with some more luck I could have scored higher I think. Amusingly I managed to get ROD in all three quarters that I didn't start in, before running out of units to do it in my own deployment zone. In hindsight I think I should have reserved more units and gambled on the 9 inch charges rather than just letting them get shot up.

In the end, one win and two losses is reasonable enough for me. I was hoping for 2-1 but I think I got three fairly tough match ups, including one which was a straight up counter - always a risk when taking a pretty spammy list. In game one and three the Meganobz were great, but it was very much reliant on some lucky rolls so I think I'm still going to take more boyz instead in future variants of this list. Interestingly enough for the Green Tide list, I never took the Green Tide secondary. I think against very killy armies it's too much of a risk as they can just chip all my units below 15, but it's good to have in the back pocket against slower, more defensive armies. This event has given me more to think about for sure, but it's mostly confirming my thoughts about the list - needs more Boyz (but not against Tau!) As an added bonus, even with a million models I did in fact finish all my games just about within the time limit!

Thanks to Grim Dice for running, and to all my opponents for good games. Even against the Tau I had a laugh and learned some important lessons. And thank you for reading, I hope you enjoyed, and stay safe out there.

Sunday 19 December 2021

Battle Report - Orks vs Adeptus Mechanicus and Imperial Knights

Hello!

Back to the Old Wolves Warhammer World meet up - for a second game my infantry heavy Snakebites teamed up with some vehicle heavy Freebooters to take on Imperial Knights and AdMech Robots! My list was the same as in the last game, but with the addition of 1250 points of buggies, Squighog riders, Killa Kans, Deffdreads and a somewhat familiar Burna Bomma

Our opponent took two 1250 point lists to the event, so mashed them together. The Knight Magaera, Knight Valiant (#rightdominus) and a Helverin teamed up with two big units of Kastelan Robots, a cheeky 5 Rangers and a gaggle of supporting characters.


Here's the deployment. Funky right? Another Open War draw:


Six objectives, scored in the command phase, a funky chevron no man's land deployment and extra attacks all round! I kept the Koptas in reserve and the Freebootas popped their Deffdreads in the tellyporta. The Kommandos did a sneak up the flank. The roll off happened and Orks got first turn...


Turn one features a lot of moving forward for the Orks, claiming lots of objectives for next turn and having some inconsequential shooting. The Bomma flew over the blob of characters and Robots to deal out a few mortal wounds, while the Kommandos ran up and deployed their distraction grot to inflict some damage on the Magaera, though not enough to degrade it, and all ending up dead in response.


The Mechanicus forces shuffled around a bit turn one, with a lot of targets in sight, and opened fire. Purple and Blue boyz suffered heavy casualties, Beast Snaggas were wiped between shooting and melee from the Valiant, our Squighog Boyz fell and the Bomma took damage but stayed in the sky. Overall could have been worse but we wouldn't be able to absorb that every turn! We were however starting turn two on three objectives, so that's points on the board.


Our turn two and it was operation claim objectives and kill a knight. The Magaera drew the short straw, taking some somewhat flaccid firepower from the newly arrived Deffkoptas, Killa Kans and Shokk Jump Dragster. On the other flank the Dreads dropped in, while the flyer left the board and the remaining Boyz and Squig moved up to get in the way. Rather unfortunately the Deffdread closest to the Helverin failed the charge, but one did make it into the Robots alongside the Wartrike, after the remaining Boyz ran in to eat overwatch. They didn't end up doing much damage but they did stop scoring. 


On the left a lot of stuff piled into the Magaera, but only the Hit 'em Harder Meganobz were required to strip off it's remaining wounds and bring it down. It then promptly exploded, taking a huge chunk out of the Ork advance!


Mechanicus turn two, they picked up two objectives and got to killing. One of the big robot blobs used a teleporter stratagem to jump to the other side of the board and assisted the Valiant in clearing a lot of stuff from the flank, though thankfully failing a charge into the remaining Killa Kans. The remaining robots and Helverin on the right flank cleared the Orks off their objective and took out two of the three Dreads. Another brutal turn to blunt our offense, but we still held three objectives.


Turn three, up to 6 points for the Orks, but running out of assets. The plane came back and did a smidgen of damage. Left flank basically did nothing other than tripling up on an objective with Boyz, Kans and my Weirdboy. On the right flank it was operation stop scoring - the remaining Dread and the Smasha Squig went ramming into the Helverin, battering it with mortal wounds.


The Kans charged into robots, this unit lacking fists so they would be 'relatively' safe in there, and more importantly making it tough for the Kastelans to claim the objective. Added bonus - the Kans brought a couple of them down!

Going into Mechanicus turn three, and a mere one objective being held by the Valiant. 6-3 to the Orks currently!


Not much left for the Orks after the turn three shooting and melee. The Dread was cleared off the former Helverin objective, though the Nob on Squig survived. The fist robots managed to make it into the remaining units on the left flank to take their objective. On the right my remaining boyz on our 'safe' objective took some damage, and the Kans got peppered with melee shooting and then charged by the AdMech characters to try and shift them, but they held for now. In the centre the Valiant charged into my 11 strong Gretchin, killing off 10 of them, leaving one 'Orrible Git on the objective! Since he was clearly a brave boy, I spent the CP to keep him from running.

Thanks to that, the Orks controlled four objectives in turn four, giving us a score of 10 points! We had very little left to play with though, so all we could really do was throw the Squig Nob into the shooty robots to unsuccesfully try and stop them claiming our objective from the Kans


Thanks to a lone Datasmith (which in hindsight we should have targeted with the Bomma), the Mechanicus alliance picked up four points, leaving the score 10-7 going into turn 5. The Grot got obliterated, and the Kans were overwhelmed. Some long range firepower pointed at my Boyz, killing them down to just the Nob. This meant that, looking at turn 5, the Mechanicus would be scoring four points regardless of what we did, for a total of 11. We were currently sat on 10 points, so would need to score a single objective in our turn to draw the game. So it all came down to a morale check on the Nob, needing a 1, 2 or 3 to stay.

I rolled a 4, handing victory to the AdMech and Knights, 11-10!

Another gloriously close game! I think we were left with just the Bomma alive, while the Imperial forces still had a big knight and more than half of the robots, but it still came down to a single dice roll! Regardless of the result, I had a great time catching up with people and hanging out in Warhammer World (and having a nice burger at Bugman's!) - I hope you've enjoyed these write ups, thanks for reading and stay safe out there!


Friday 17 December 2021

Battle Report - Orks vs Black Templars

Hello!

Last weekend I had a cheeky visit to Warhammer World as part of a meet up with the Old Wolves discord group. I brought my Orks, and some Death Guard for Cris, who gave me money for them and came all the way from the USA for the meet up! She also brought a 1250 point force of Black Templars, so we had a classic Armageddon battle, on one of the awesome Warhammer World themed boards.


My 1250 points was a bit of a take on my Green Tide style Snakebite lists. I had Warboss Redtoof (Brutal but Kunnin' and Super Cybork Body), Weirdboy Durrork, three units of 15 Boyz, 15 Beast Snagga Boyz, 15 Kommandos, 3 Deffkoptas, 3 Meganobz and 11 Grots.


Cris took a couple of Crusade squads, some Assault Intercessors, Bladeguard Veterans in an Impulsor, a couple of Redemptor dreads, a Techmarine and all lead by a beefy Primaris Chaplain on bike. As you can see, they were watched over by a purple squig!


In fact, both armies were accompanied by crocheted squigs made by my wife. So far the mascot has been doing pretty well for me and my Orks!


We used the Open War cards to generate a scenario, and here it is. A very aggressive deployment, three objectives, one of which will be worth two points, and a spooky twist to make morale more punishing.


Deployment - a classic for the Orks, lining up on the edge of the zone, while the Marines held back a little behind the defensive line. Kommandos held up in a ruin next to an objective and the Koptas stayed in the sky.

Orks got turn one, and we rolled for the priority objective - it was the single one on the right flank, by the Kommandos. My turn was pretty much just advancing forward and covering all the objectives. Come at me!


Templars turn one, and the Crusaders made their move, charging into my forward unit of Boyz. The rest moved up and poured some fire down - the Redemptors made a mess out of most of the Kommandos, leaving only a couple left after morale. The Crusaders and Boyz exchanged some blows, both losing some but sticking around with a few models.

Orks picked up a bunch of points, and were ready to WAAAGH!


WAAAGH! Called on turn two, lots of units advancing up for some charges. Grots stayed back to hold an objective, while the remaining Kommandos abandoned theirs, leaving it in the hands of Beast Snagga boyz and Deffkoptas. A unit of boyz decided to ignore the third objective in favour of charging Assault Intercessors.


Shooting was basically just Deffkoptas and was underwhelming. Time to get stuck in! Both the characters did good work to clear up Crusaders, the Boyz cut down the Intercessors and the remaining Kommandos chipped a few wounds off a Redemptor before being pounded into the ground like a tent peg.


Going into Templars turn two, the Orks held most of the objectives and had pushed forward, but were ripe for a counter attack.


Here come the Templars! Bladeguard disembarked and lined up a charge on the purple boyz. The Redemptors marched forward and hosed down the Beast Snaggas with plasma, melting them into burning green goo. The Chaplain gunned his engine and swept round the flank to claim an objective and spray the Gretchin with bolter fire. The Bladeguard set themselves a pretty low bar by making a very low charge roll and only killing a few Orks, leaving most of the mob out of melee and free to charge in next turn.

After turn two the Templars got a score on the board, but were trailing 6-1.


Right, time to get rid of one of those Redemptors. Between Rokkits, smite and Hitting 'em 'Harder Meganobz we did bring it down. 


Elsewhere, the blue mob aided by the Wierdboy knocked out the Impulsor (Durrork was having a pretty good game) and the purple mob charged the Bladeguard, accompanied by the remaining pink Nob, who somehow survived all the return attacks.


Time for some real aggressive moves from the Templars. The Redemptor marched forward, cutting down two of the Koptas with plasma, before charging in to take the last one off the priority objective! The Chaplain decided those grots had to be purged, and left his objective to try and claim theirs. He reduced them down to a few models, but even with the twist, grot rules and below half strength combing to mean the grots were running from attrition on 1-4, they stuck around! Another point for the Orks but two for the Templars. 


So that other Redemptor had to be moved off the objective! In addition the blue mob was going to join in against the Bladeguard to make sure they couldn't go onto the objectives. The Chaplain would just have to be left alone to do what he wanted. The purple boyz eventually died but the Bladeguard were having a bit of a nightmare and were unable to clear their way through the mob, and really struggled to finish off that one pink Nob!

Over the course of turn four the dread cleared it's way through the Meganobz and the Weirdboy, finally turning to smash down Warboss Redtoof. With the Chaplain controlling one objective and the other ignored, it all came down to who controlled the priority. With Redtoof fallen, I played 'Orks is Never Beaten' to strike at the damaged Redemptor...


Thanks to it's 5+ invulnerable due to it's vow, the Redemptor survived on one wound, after passing one last key save off the Brutal but Kunnin 'reroll' attacks. And with that it collected the priority objective points at the end of the game leaving it tied at 7 all!

Amazing, brutal game! Both sides ground down to one or two units and a stalemate on the objectives. Of course it's always fun to have a big melee mash up, so this was always going to be a bloody one! Regardless of result, I'm always a fan of a game being close enough that it's decided by a final dice roll.

Anyway, hope you enjoyed, because there will be a fair amount more Ork battles coming soon! Thanks for reading, stay safe!