Showing posts with label WIP. Show all posts

Saturday, 18 March 2023

Speed Painted Orks

Hello!

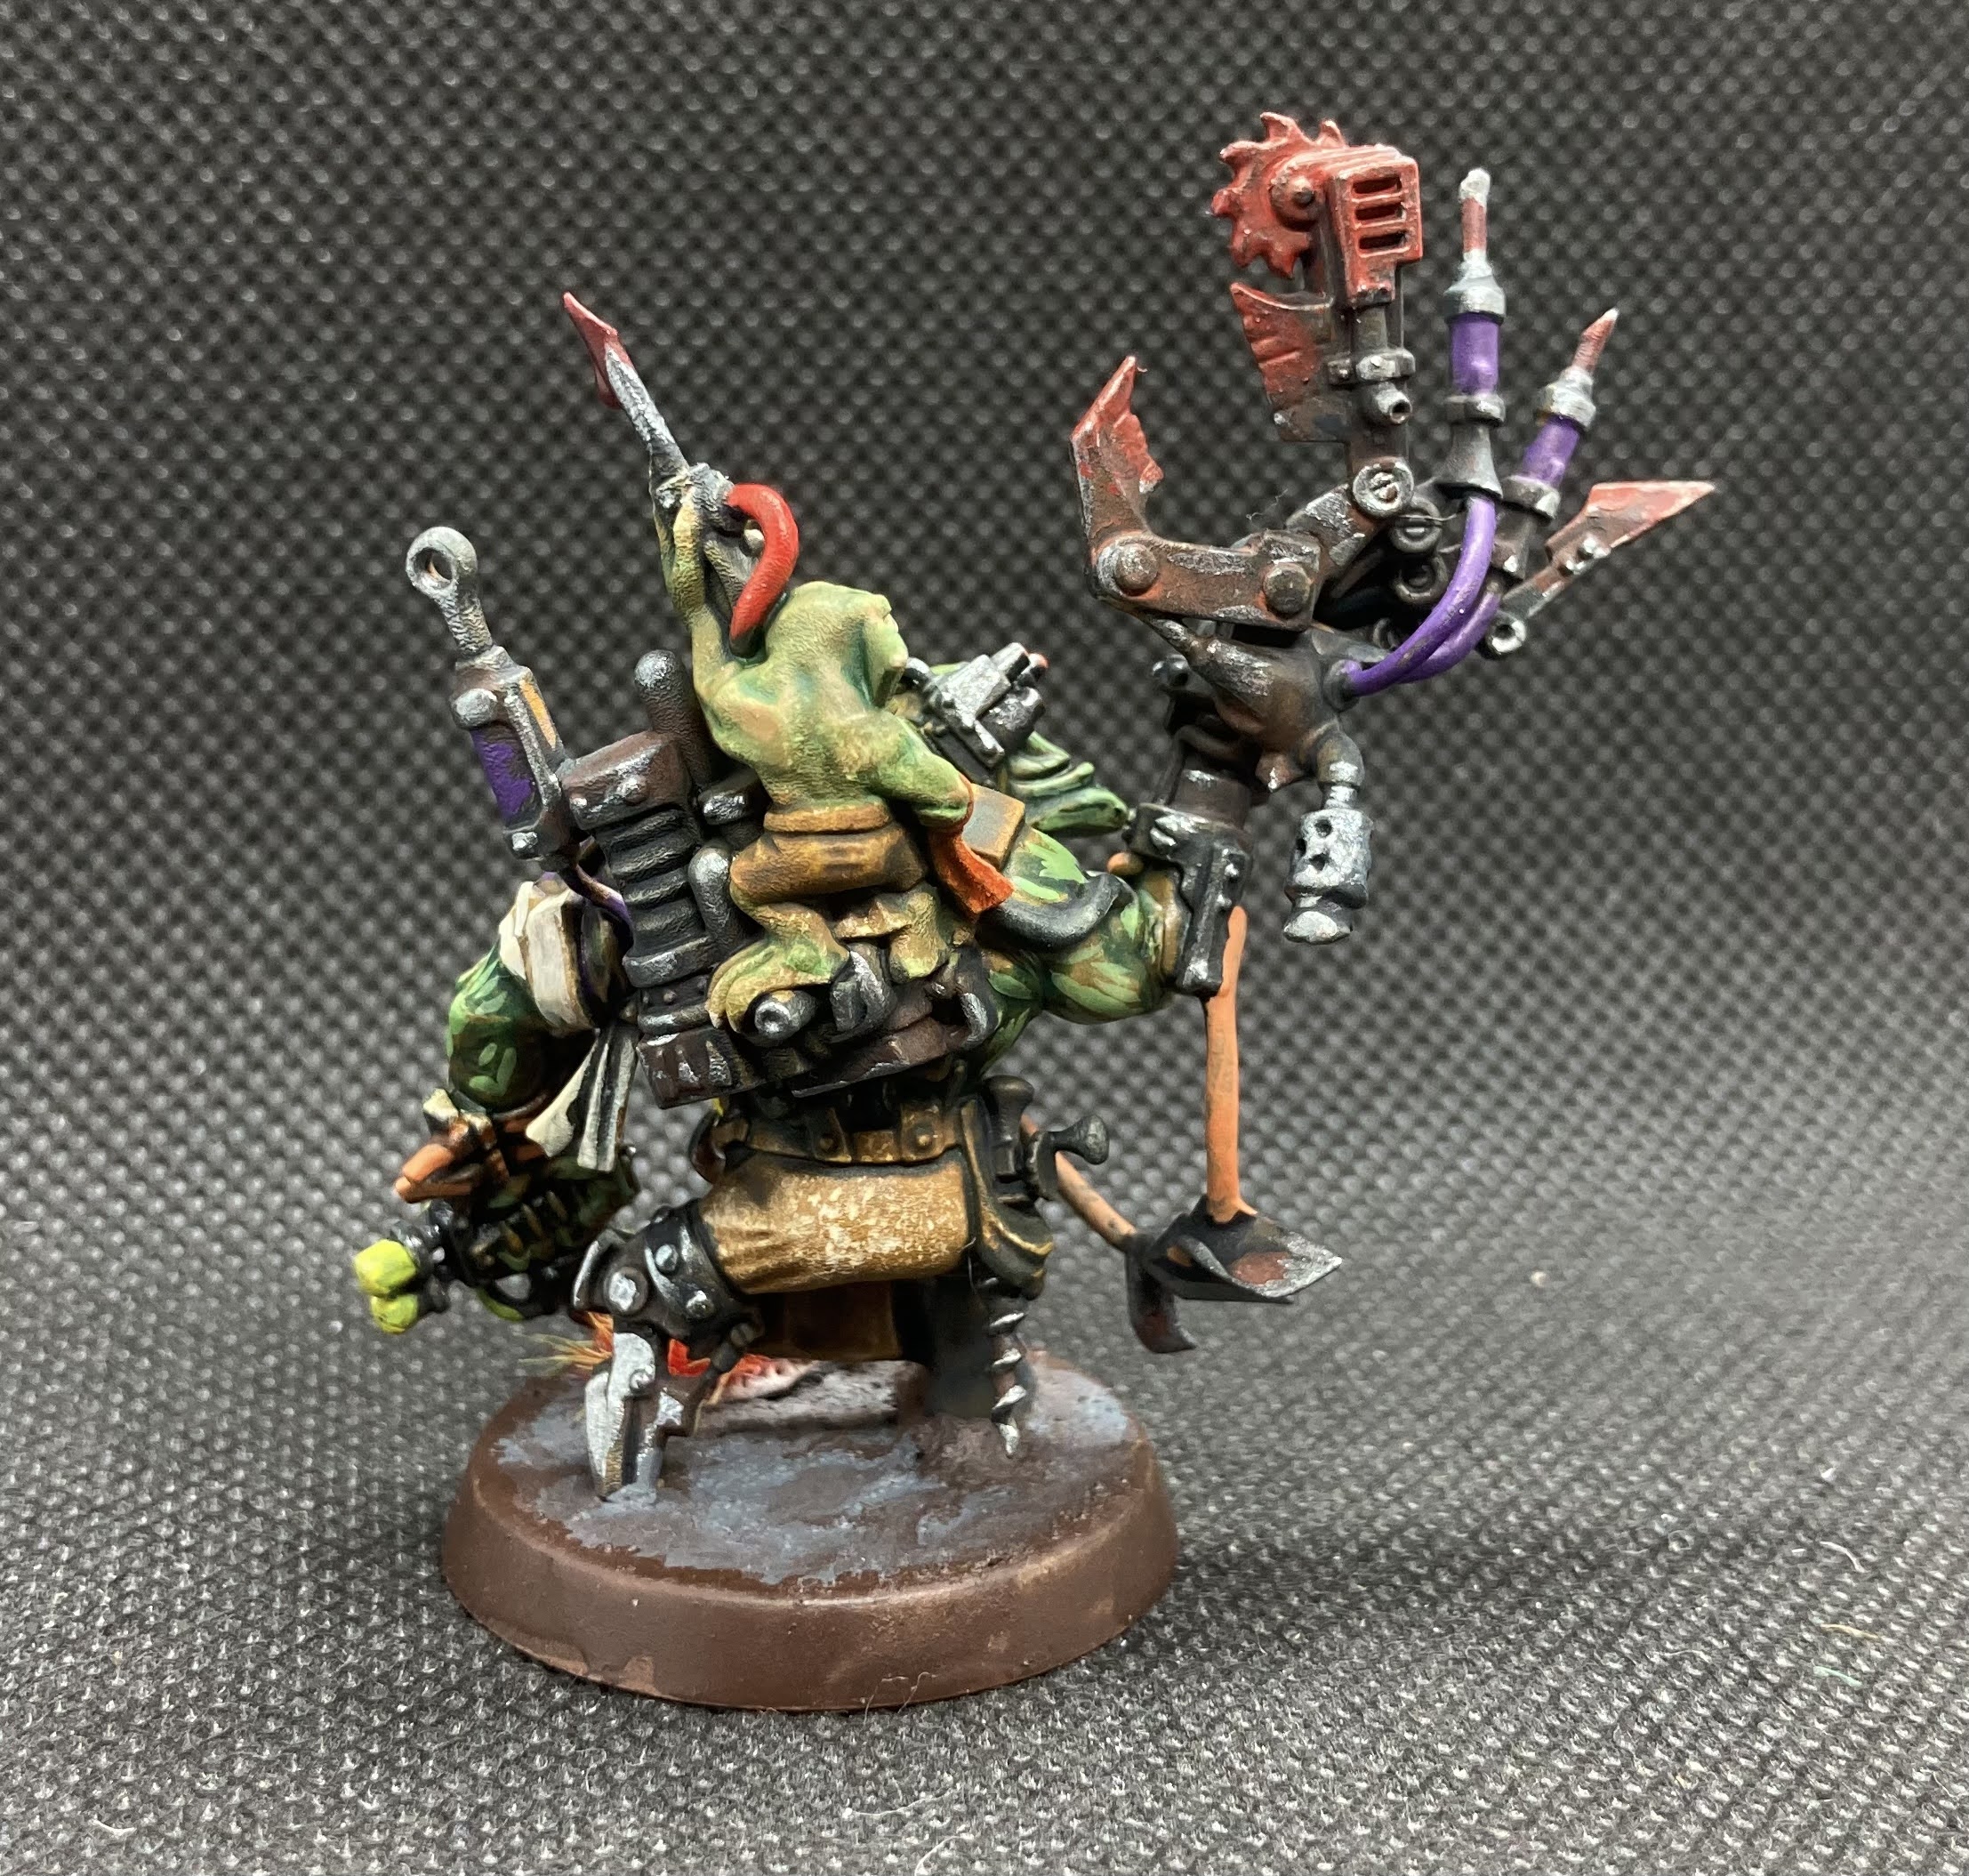
Here's another couple of smaller projects that I finished up recently, both of them quick and dirty, but very fun, paint jobs on some Orks! First up, 'Spongechop', slightly converted Warbikers:

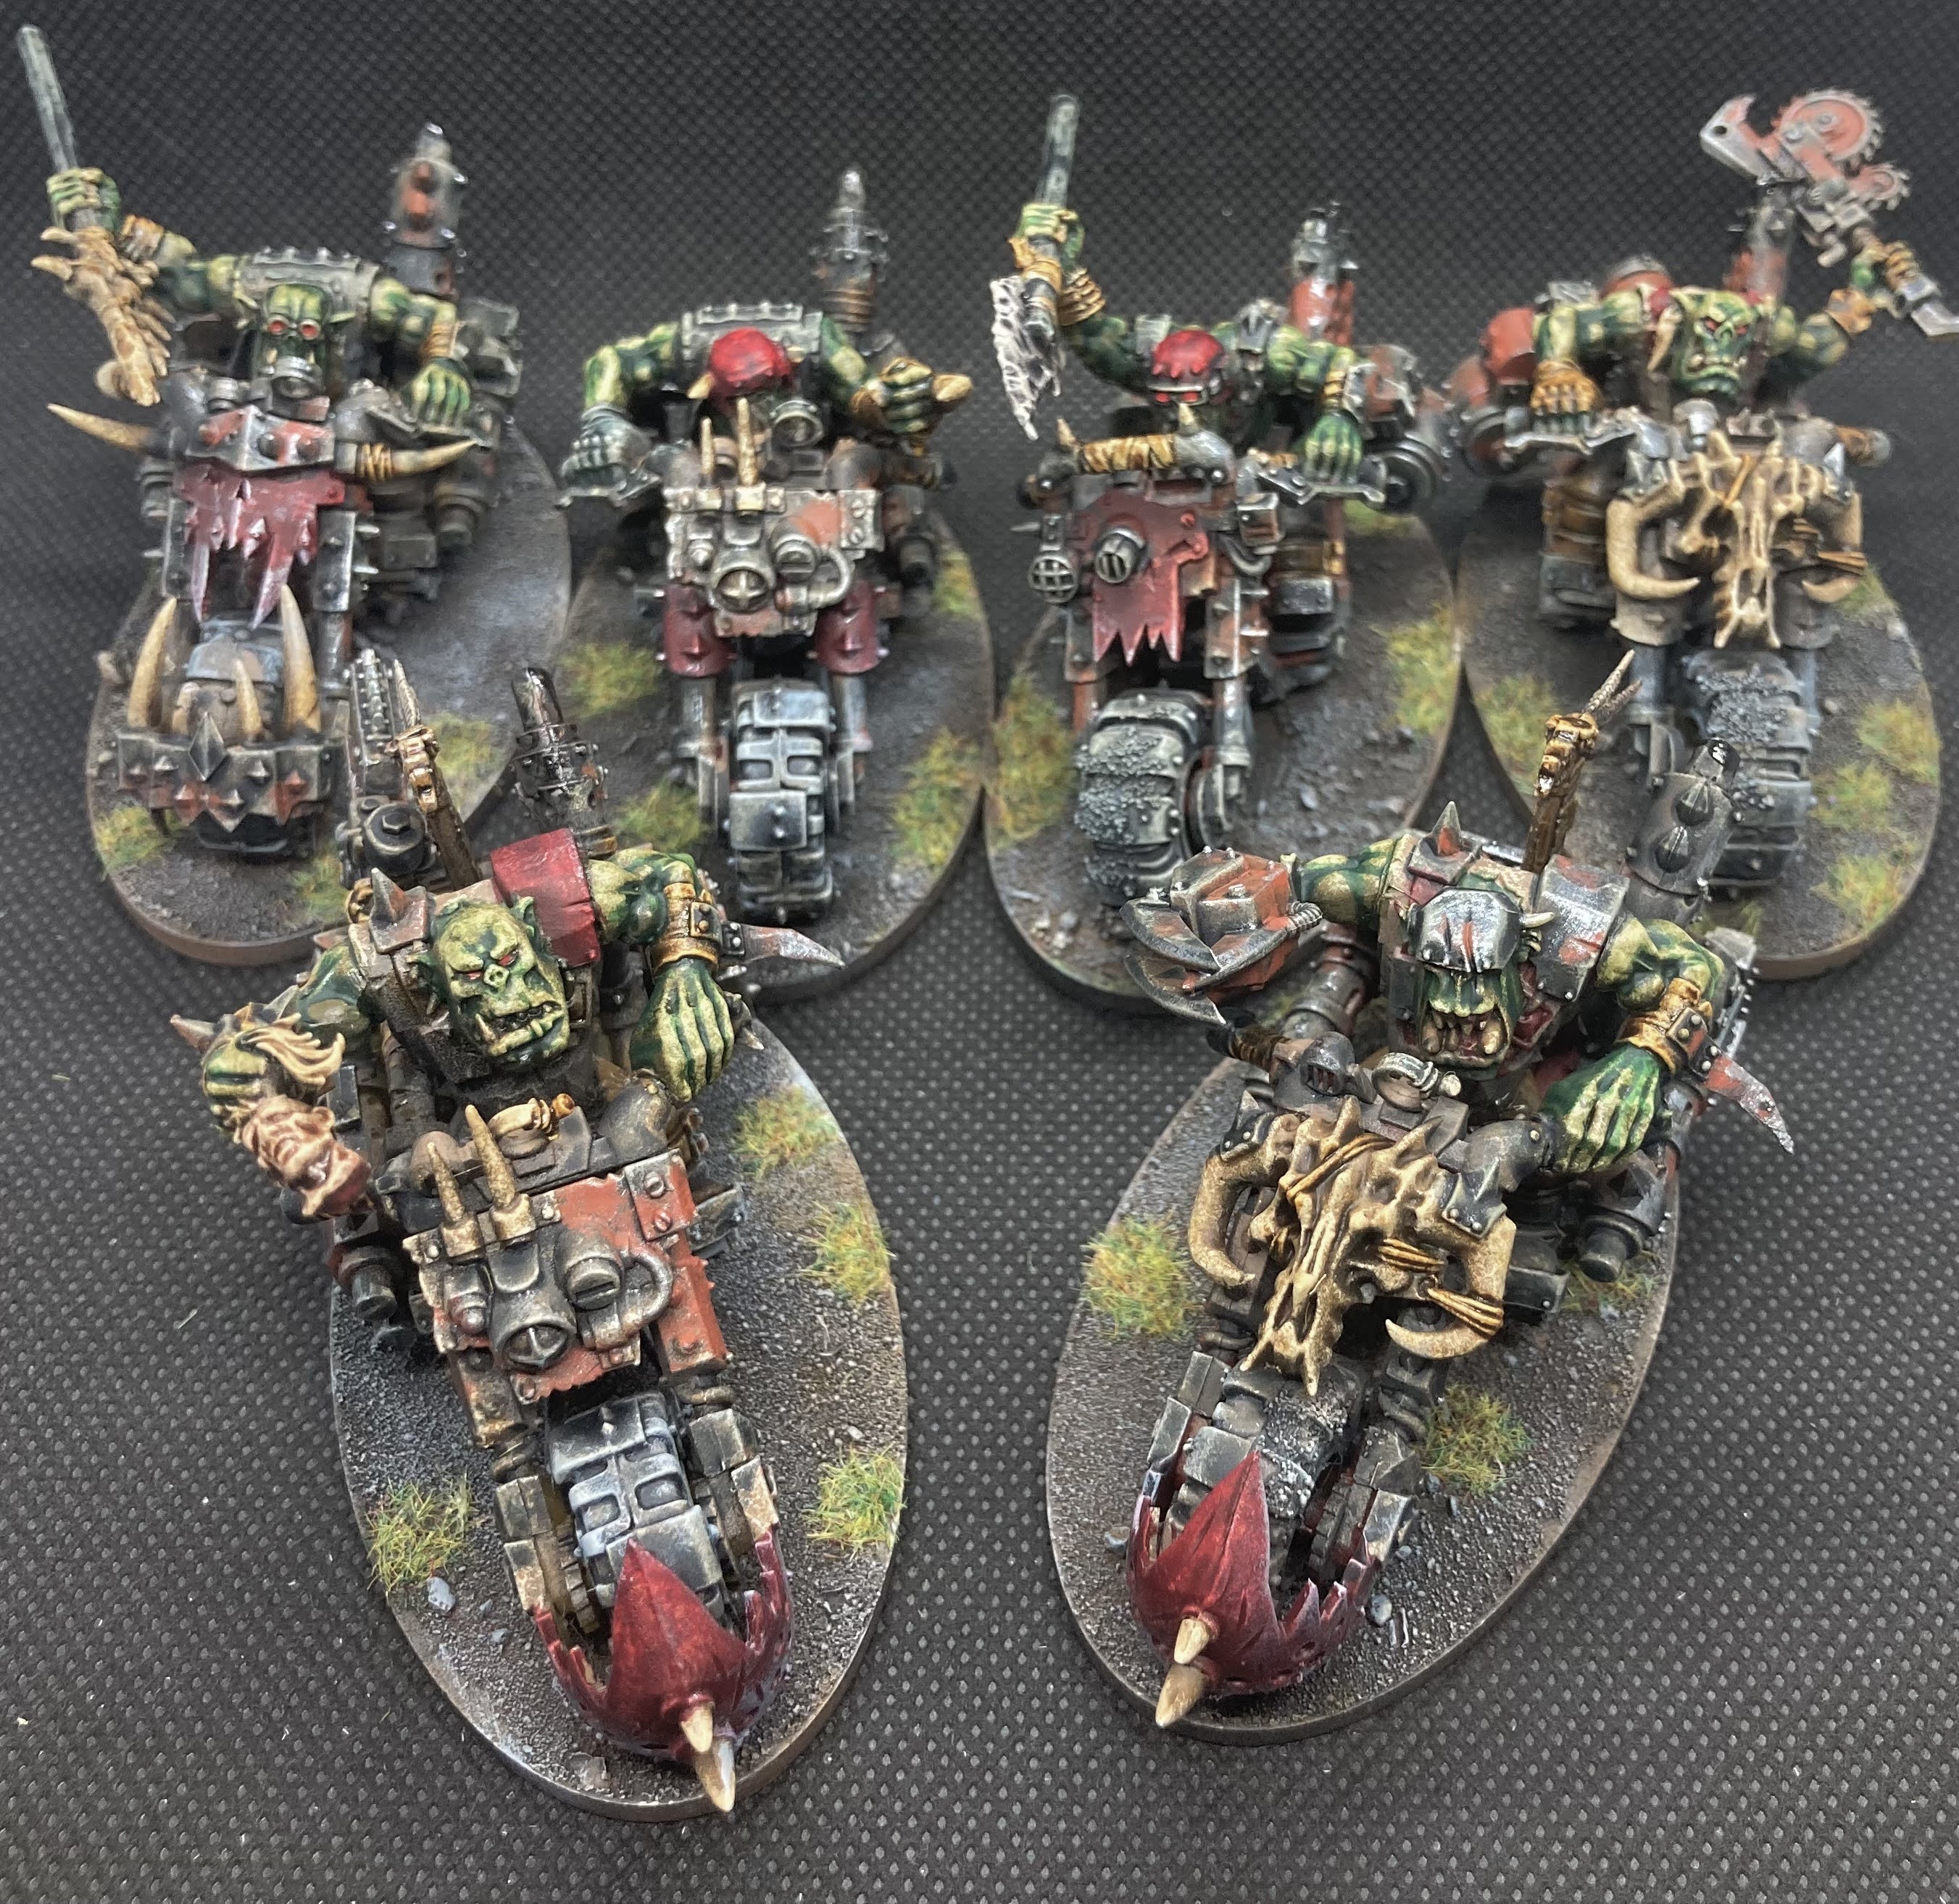
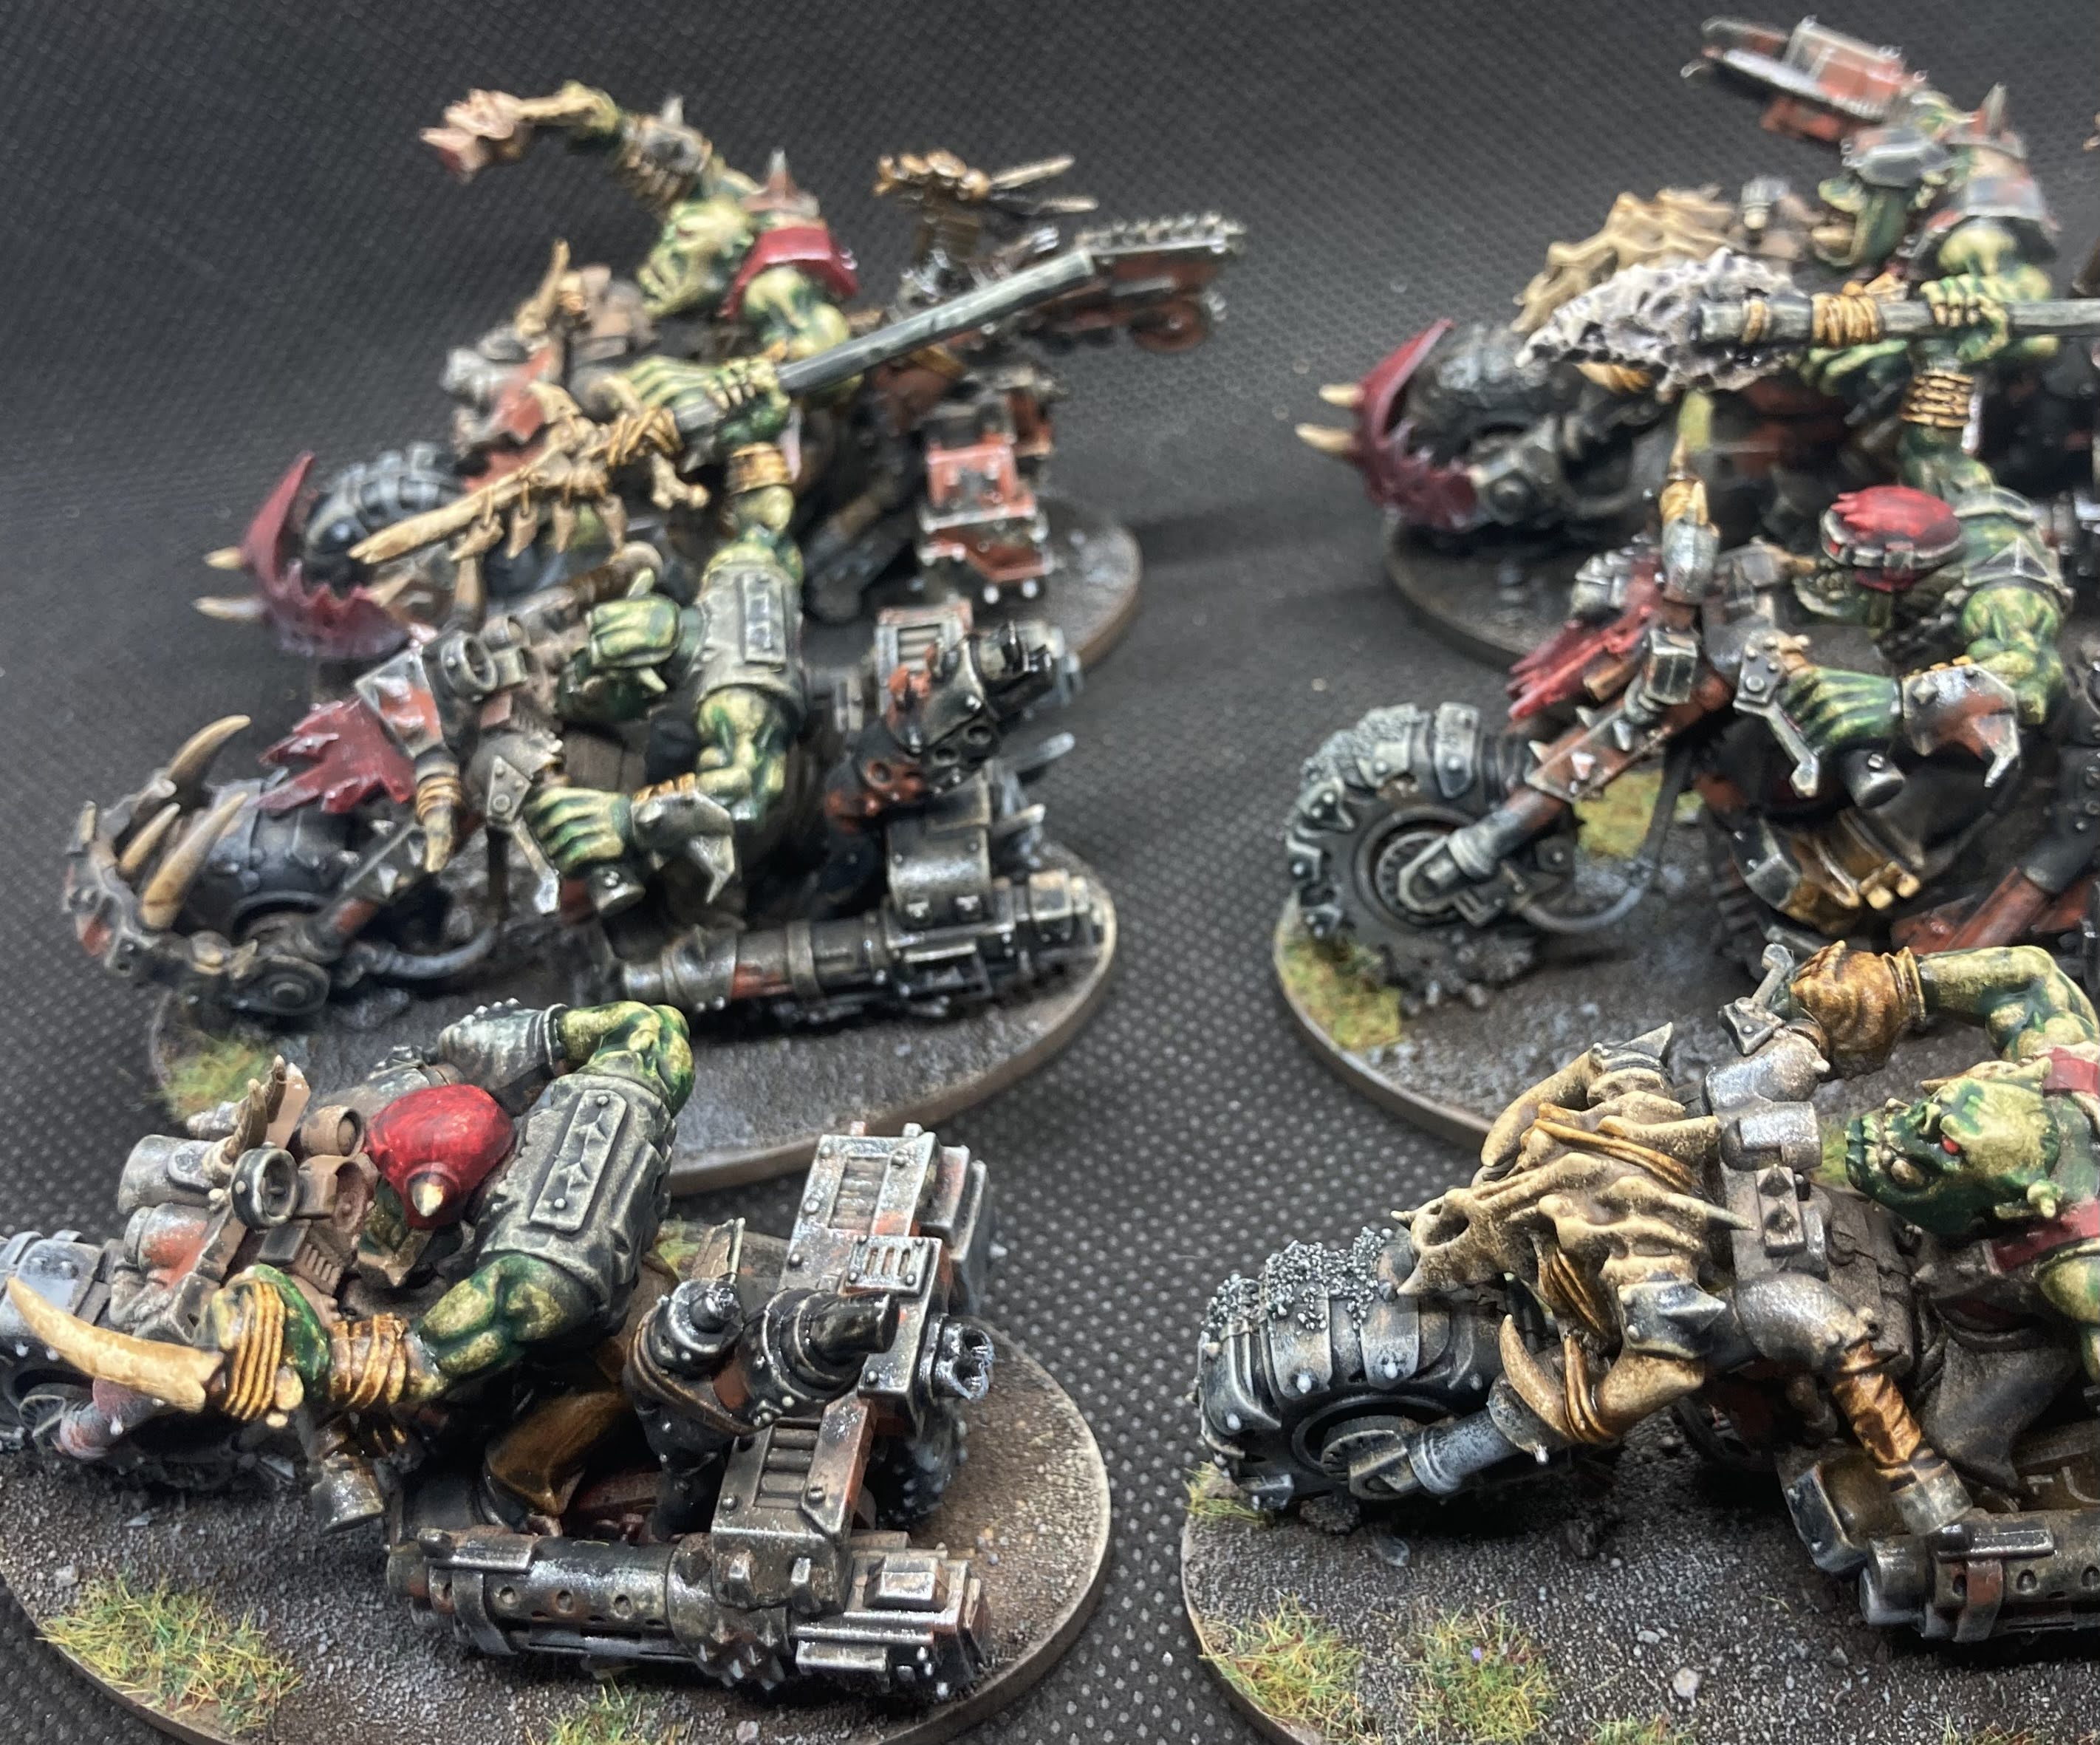


Though a little more work was done after, these were essentially done with the 'slapchop' method -  washes or contrast paints over drybrushed models, except that I used the mighty sponge instead of drybrushing, giving a bit of a different texture to the final result:


Here the post sponge stage - I initially sprayed them black, then brown zenithal, then sponged on leather, bone and finally off-white. As you can see this has picked out the raised areas and added texture, while leaving the shadows very dark.


And here are the same models after a coat of contrast over most of the model. I went Militarum Green for the skin, Snakebite Leather for straps, Skeleton Horde for bones and tusks, Flesh Tearers Red for some details and then Black Templar mixed with medium for most of the bikes. I left some of the clothes and deeper areas of the bikes un-contrasted as they were already dark and essentially the desired colours. I added more detail, including a bit of a metal drybrush and some Ork Flesh contrast to the recesses of the skin to get the finished result seen above, but I think they'd 100% be usable at this stage if you wanted a nice quick job.

In a similar vein, the next project was another Ork model painted in a similar style - a Painboy. This was another of those discord one hour speedpaint challenges, so I thought it would be the prefect excuse to test the techniques used on the bikers above against the clock! 
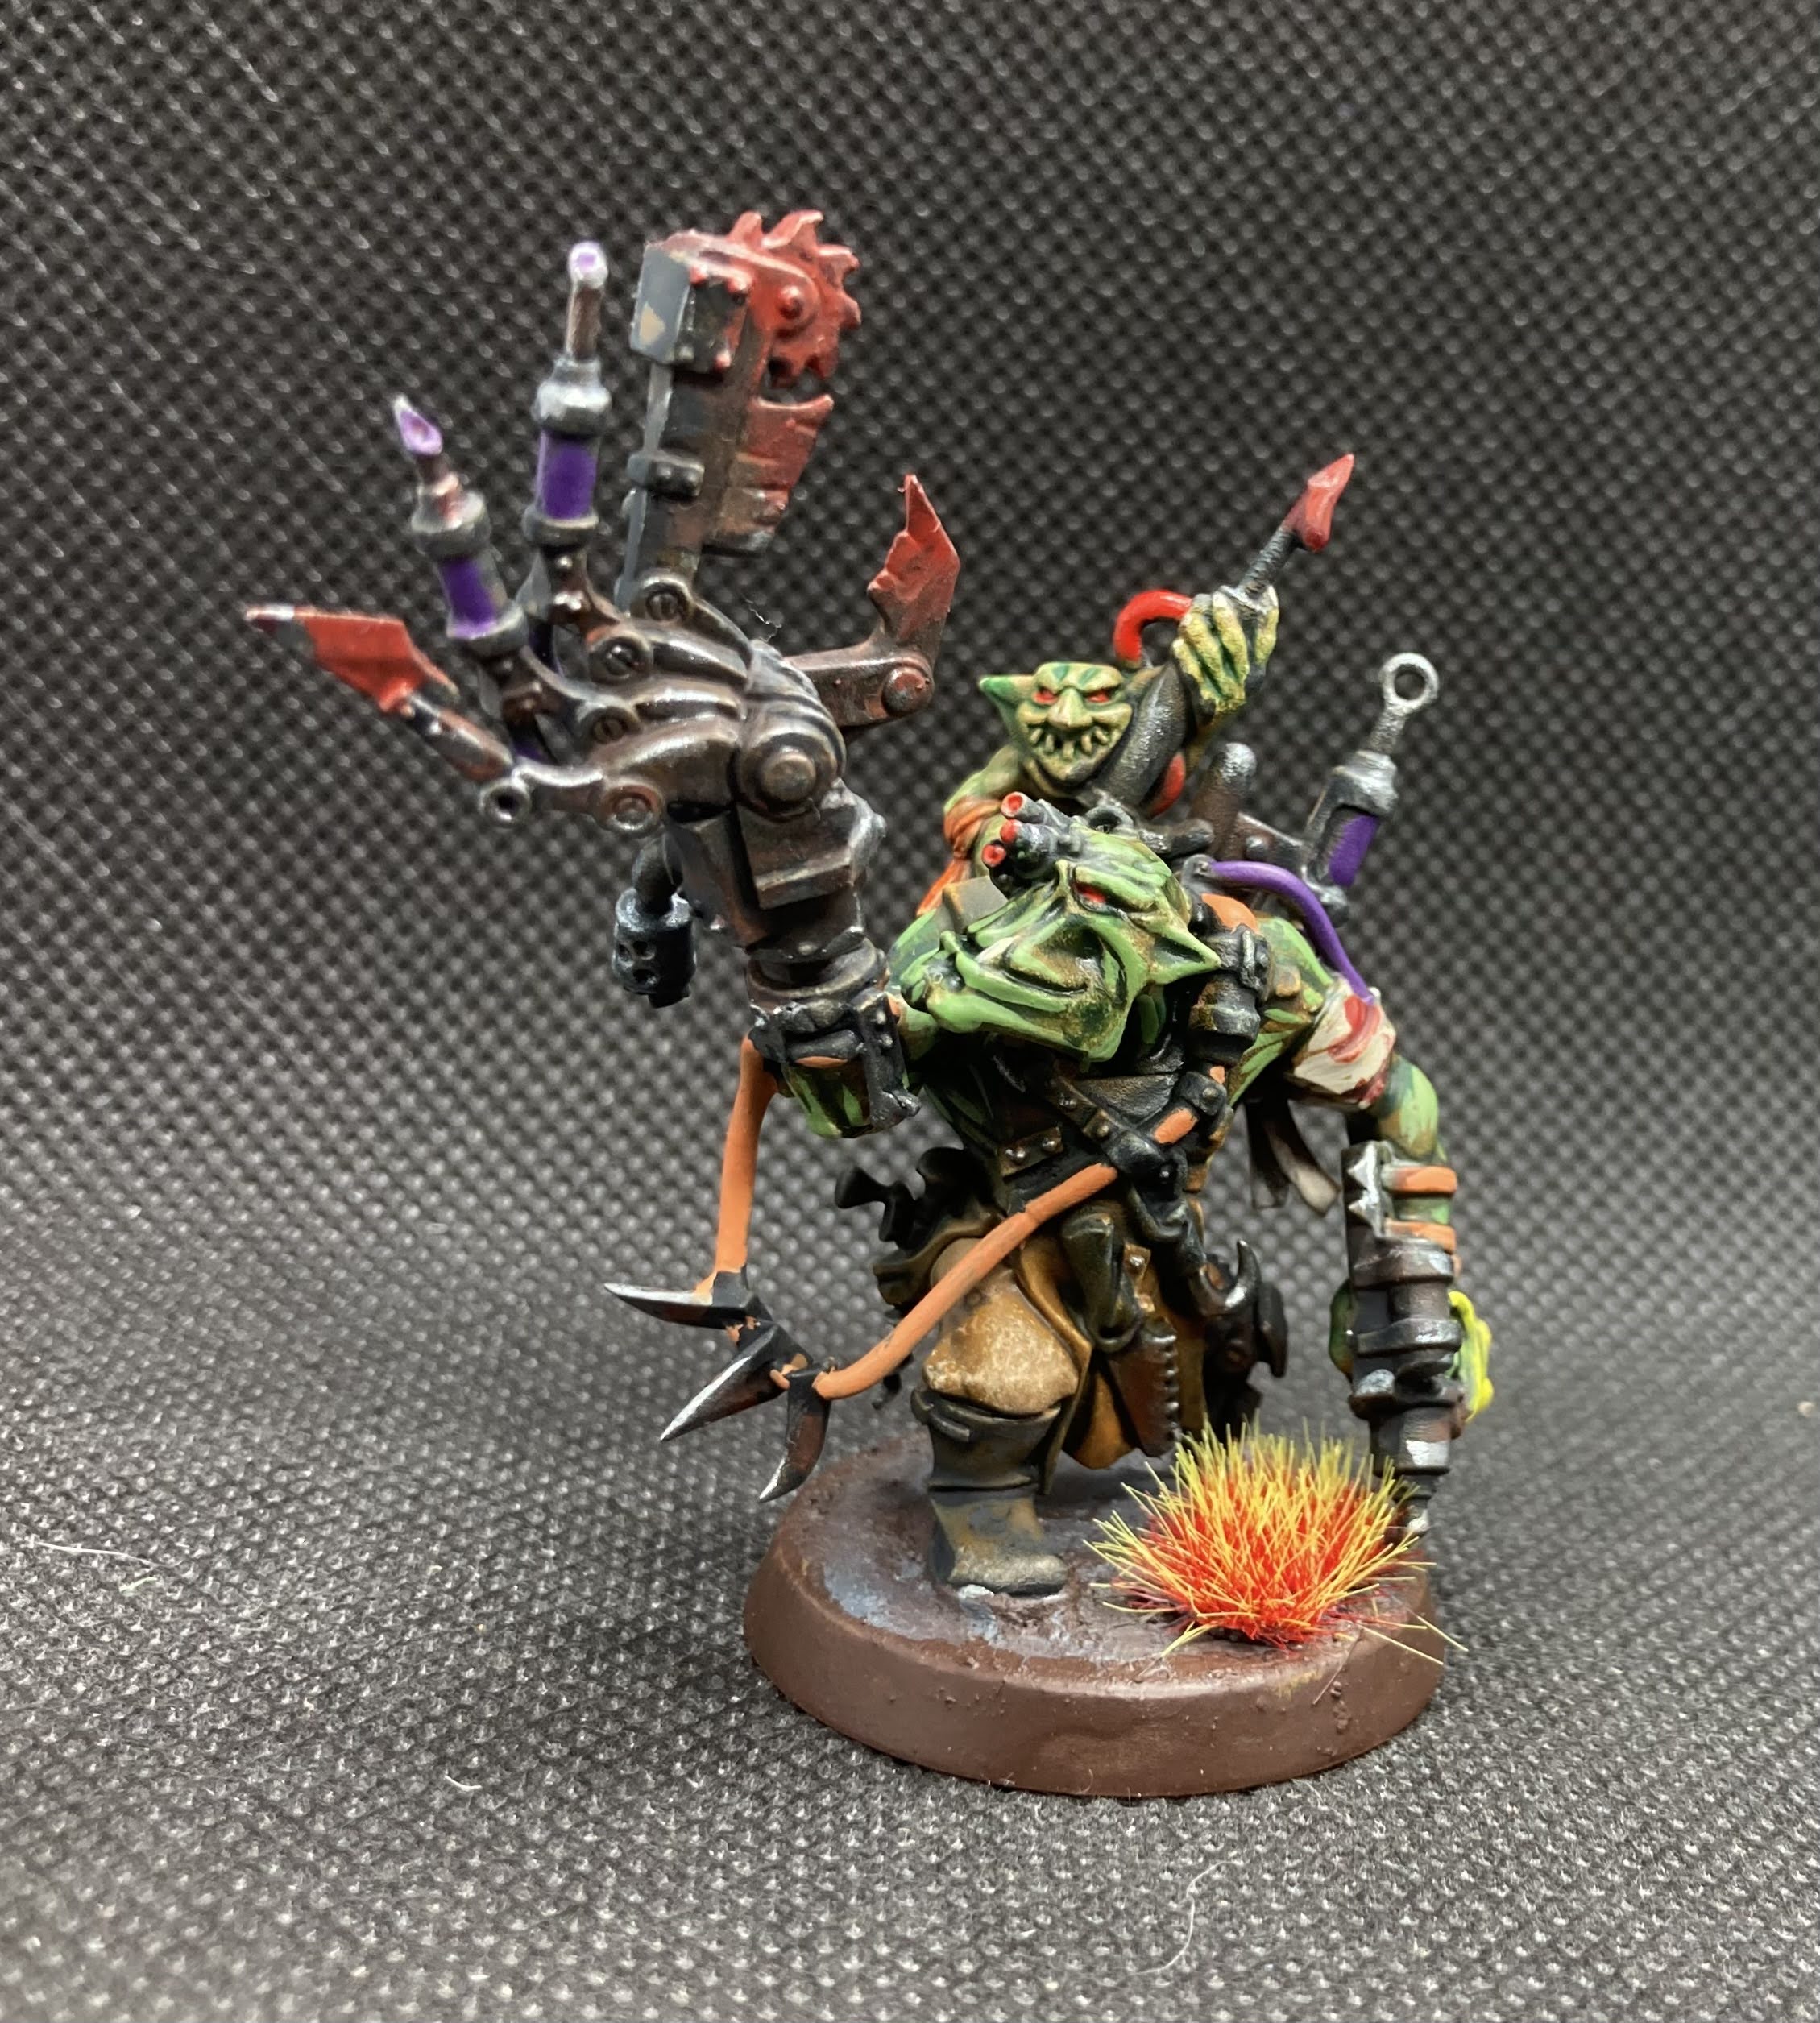


I'm very happy with the results once again, especially for an hour's work. I wasn't initially very happy with the Ork skin with just the contrast over the sponge work, so I added some extra highlights to make it pop out a bit - though the skin on the grot worked very well with the lighter plaguebearer flesh and a bit of ork flesh shading. The sponging is absolutely ideal as a base for all the dirty Ork clothes and rusty metal though which was all easily achieved very quickly.

Anyway, hope you like these boyz, thanks for reading, and stay safe out there!

Wednesday, 2 November 2022

Leagues of Votann Step by Step

Hello!

As promised in the previous entry, here's a step by step tutorial on how I painted the purple Leagues of Votann. We're going to be looking at the plasma gun guy here, but I did in fact batch paint the whole lot at once, which this scheme should allow to be done relatively easily. 


First up, the models were sprayed bone (I used army painter spray but I'm sure pretty much any bone coloured spray will work), then heavily drybrushed with white.


Next, I used Skeleton Horde Contrast, diluted to about 1 in 3 with medium, to wash over all the undersuit sections, giving a cream look.


Time for some purple. It's Leviathan Purple Contrast, mixed to 1 in 2 with medium so it goes on nice and smooth, and still shows through some of the highlights from the drybrush earlier. I went over all the armour panels, leaving as much white as possible over the sections that are going to be yellow.


A couple of steps here - the yellow shoulders and black for the metal areas. The yellow is Vallejo Game Colour Heavy Ochre, I think it's my favourite yellow, nice muted colour and good coverage, a couple of slightly thinned coats worked for the majority of the models. The black is just straight up neat Black Templar Contrast, covering tubes and cables as well as the exposed metal parts of weapons and backpacks etc. I also used the black to go into the gaps around the head inside the armour.


Here's the most fun stage, followed immediately by the least fun. I sponged on some Gunmetal (I used the Game Colour one, but there should be a suitable equivalent in your paint range of choice) over all the metal and some select armoured areas, trying to avoid going onto the under suit too much. This gives a good worn effect for the metal and some nice chipping on the armour, and is loads of fun.

Then I had to tidy up the bone areas, which was boring, but necessary. In addition to cleaning up any under suit mess, I painted the bone over any slips onto the faces or pouches.


Speaking of pouches, they were up next with Snakebite Leather Contrast. This was also done over the coats and stowage for the Pioneers and Kahl. At this stage I also used Militarum Green to paint the containers on the back of the Pioneers.


On to some more detailing. The gold for visors and other details was painted with Game Colour Glorious Gold (though again, I'm sure most ranges have a good equivalent) and then washed with Skeleton Horde. The faces and hair were all washed with various contrast paints, Guilliman Flesh and Snakebite Leather doing most of the work in some combination.


Final details were any glowing areas painted white then washed with Hexwraith Flame - leaving a bit of over spill to simulate a bit of lighting, and any final tidy up - like repainting some of the goggles or facial cybernetics.

Last but by no means least the bases - Astrogranite Debris Texture paint doing most of the work, with black rims and the odd tuft here and there.


Ta da! Done, as you can see he fits in there on the bottom right corner with his fellow Hearthkyn. Hope this helped in some way, thanks for reading, and stay safe out there.

Tuesday, 8 February 2022

Sponge Mini-tutorial - 'Sponge Nid' Project Part Two and a Half

Hello!

Just a quick one - I thought I'd do a bit of a mini tutorial on how I do my sponging, as seen on two Death Guard projects from last year, assorted other bits, and most recently the green and purple Tyranid commission. It's not a miracle method to instantly paint all models, but it is a fun alternative to drybrushing if you want a slightly less controlled and more textured look. I don't know if there are people out there who maybe don't know quite what I mean when I say I'm sponging something, or maybe there are those who just want a little persuasion to give it a go - either way here's a little run down of the method I use.


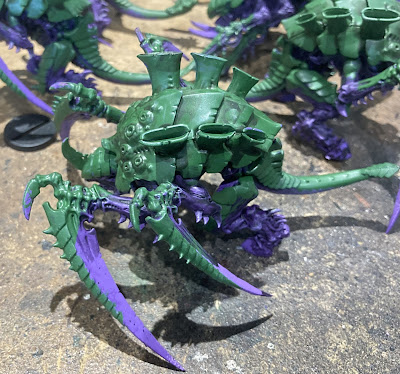
Here's the starting point for this miniature. Base colours are on and a bit of shading, ready for a highlight layer on that green. Note that you can easily do this the other way around - sponge on a lighter layer over a base coat and then apply a contrast paint or wash over for a more muted effect. In this case we are going to be sponging on some light green over the carapace etc.


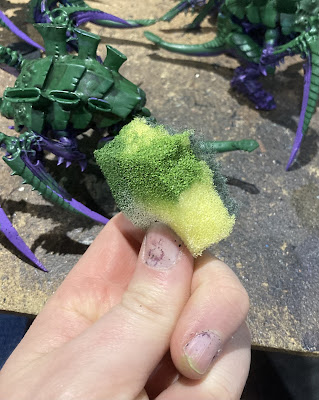
Here's the sponge I'm using - it's about a quarter of a cheap sponge scourer from a Tesco multipack. As you can see I've loaded up a corner or edge with paint - much like drybrushing you can vary the amount depending on how strong of a highlight you want, I find there is usually a sweet spot that is a little bit wetter than an equivalent drybrushing would want. You can also see that I've used this bit of sponge before on the far side - you can use the same area once it's dried multiple times, eventually it'll clog up and become hard to use but you don't have to throw it away after each use.


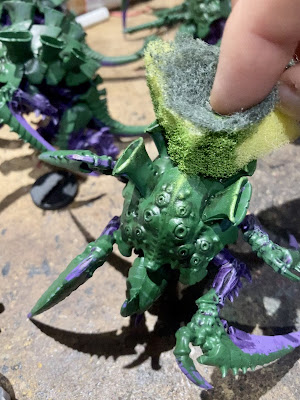
Here's the actual sponging in action - simply dab the slightly wet sponge over the areas you want to highlight, applying more or less pressure depending on the desired effect. Too wet and too much pressure will just paint a big blob onto your model so you will want a certain amount of restraint, but with a bit of a dryer sponge you can really go ham at the model if you want! With these sponges the scourer pad also provides a nice easy bit to hold on to which is nice - I've used sections of packing foam instead to get smaller areas but it is a bit harder without a firm section to grip.


Here's the result after the green sections were sponged - I went back over once it was dry with a bone colour for another highlight layer with less paint on the sponge and a lighter touch. As you can see it produces a mottled, natural looking effect which really suits this kind of model. It also works great for chipped paint or flecks of rust etc.

I don't claim to be an expert by any means, but this is something I've been enjoying and it gives a nice effect, I definitely think it's worth giving a try, if only just to have another painting tool in the box. Hope you enjoyed this little guide, thanks for reading and stay safe.

Saturday, 13 March 2021

Contrast Kraken Tyranids WIP - My Painting Scheme

Hello!

The last post on this blog was my Death Guard painting scheme, so anyone could do it if they wanted, but mainly so I could repeat it! In a similar deal, here is my scheme for Hive Fleet Kraken I've been doing for a commission. It's mostly contrast paints, so should be easy enough to do, and I'm hoping I can use some of this contrast practice on my Tyranid force when I do some updates.


Here's some I did earlier. 

For this 'tutorial' I'm going with Hive Guard, as they are a mainstay of Tyranid armies these days and they are a decent size with lots of carapace to show the full effect.


First stage of the painting process, spray with a bone spray paint. I used Army Painter Skeleton Bone. You could use the Wraithbone contrast base, but as you'll see below there is an extra step before the contrast goes on so we don't need that 'perfect' finish.


Next, a heavy drybrush of white over the whole model. A bit messy, but it should be enough to add a little extra bit of 'texture' once the contrast is on.


Contrast Skeleton Horde, thinned 50/50 with Contrast Medium, on over all the skin. Doesn't matter if it's messy and goes up the carapace, the red will cover it easily. I tried to avoid too much pooling, but a little bit is fine and works with the Tyranid models, and with the medium in there it goes on more evenly, so you don't need to worry too much.


Next, the carapace. Flesh Tearers Red, straight from the pot, slopped over all the carapace. Key to this was using a fairly big, soft brush (like the cheap artists' brushes you can get in packs from any craft store) and painting in big, slow strokes up the carapace from the bottom, so it pools on the underside of the ridges. As you can see it doesn't dry perfectly smooth, but a little bit streaky, which would be bad on a big tank, but works perfectly for organic armour.


Next step was to fill in some details, and cover some mistakes. I used Black Templar for the claws and spikes, Magos Purple for the joints, pipes, tongues and other Tyranid weird bits, and Dark Angels Green for eyes (bad examples here!) and 'toxic' parts - in this case I used it on the inside of the gun 'barrel'. I used some regular bone paint to tidy up a few places, most notably around the hooves. With that the contrast stage us done, and they would probably be perfectly serviceable minis if you wanted to stop here. At this stage I also added a bit of Agrax Earthshade over the teeth to make them stand out and over some of the spiracles (holes) Tyranids have in the sides of their heads, base of their tails, and in this case on their guns.


This next step is the 'special sauce' if you will. Using a brighter red (Vallejo Game Colour Bloody Red in this case) I added a series of semi-random small lines or notches around the edge of the carapace, giving a sensation of texture. I made sure to cover the raised areas with this, including the inner edge of the carapace over their back, but otherwise just added them to break up the colour. I do a more involved version of this for my own 'Nids, which I intend to, one day, do a tutorial for.


Finally, time for the bases. I used a mix of Stirland Mud and Battlemire over the surface, with Vallejo Game Colour Charred Brown around the rim. Then just added some tufts and static grass to complete it. Done!

Hope you enjoyed and possibly picked up something interesting. There will definitely be more of these Kraken nids along soon. Thanks for reading, stay safe!

Sunday, 7 March 2021

Death Guard - My Painting Scheme

Hello!

In the last post I showed my new Death Guard, and since then I've painted a few more...


There will be more pictures a little down the line in their 'completed' blog post, but for now I thought I'd list how I did their scheme, in case anyone wants to copy, or, more likely, I forget.


The first step is to, after building the minis, undercoat them all light brown. I used army painter's leather brown spray. I then added some extra splashes of colour with contrast paints - this isn't going to be very visible on the finished model so it's entirely optional.


Next step is to slap some bone or off-white (I used Vallejo game colour Bonewhite) onto the ceramite armour plates. I tried to avoid the trim where possible, but not particularly hard. Coverage isn't super important here, this was kind of a heavy drybrush with some 'blobs'.


Next is the Agrax Earthshade drowning. Other muddy brown washes are available. This brings the model together a bit and covers for the messiness of the previous stage.


And now, time for the secret weapon - the sponge! I sponged on some brass, then gun metal, focusing on the trim and weapons, but letting the sponge hit raised areas on the armour as well for chipped and damaged areas. The sponge is super fun, but I'm still learning the skills for applying it 'properly', so these models that are almost entirely covered in damaged armour are perfect practice!


Next is rust - I use the forgeworld weathering powder, but pretty much any rust powder or orange paint will probably do the trick. It's heavily watered down and added to the exposed metal areas, going into the gaps and painted on a bit in streaks from bullet holes etc.

With the main colours now done, time for details and stuff. Most of this was painted dark blue or purple them either worked up with mixed in bone, or covered in contrast paints. Some other details were added in as well, including the ice blue on eye lenses and plasma coils (which then got a blue wash). The bases were then painted in a light earth colour (game colour Earth in this case) and then covered in sand, which was eventually drybrushed white after some extra PVA to keep it firm.


And that's pretty much it. It's a fairly easy, very messy scheme, but I'm happy with it. Hopefully you all like it as well, and you'll be seeing more of them a little further down the line. Stay safe out there, don't hug any nurglings!

Wednesday, 16 December 2020

Space Wolf ATVs and Armour Recipe

Hello!

Seems that this lockdown and tier system has turned this blog into a bit of a Space Wolf one! I ran out of models to paint earlier in the year (though nearly Christmas, so fingers crossed...), and having not played any real games for a while (Tabletop Simulator scratches the itch a little, but it's not the same), it's just been 'commissions'. So here's some more:


Brrrrrmmm brrrrrmmmm, it's the biggest 'bikes' around, the Invader ATVs! Can't say I was initially a fan of these models, but as is often the case, getting my hands on them has warmed them to me a lot. They were also fairly fun to paint, aside from the areas inside the driver's compartment, with lots of big obvious lines to highlight and an excuse to drybrush a load of snow over the wheels and underside. Easy to build meant the guns are interchangeable without too much hassle (just removing the pegs on the handles) and when adding some wolfy bits I couldn't resist a 'drive my closer so I can hit them with my axe' guy. In the end I'm pleased with the result, and I feel thanks to the head swaps and snow weathering, they have quite a lot of character for what is otherwise a fairly generic kit.


While I was at it, I thought I'd do some WIP pics this time, so I could record my method for doing the armour - in case anyone is interested, and in case I ever have to do any more! Firstly they were sprayed with Army Painter's Wolf Grey primer.


Next step was a drybrush of the now confusingly named Wolf Grey from Vallejo Game Colour.


Then a blob of contrast - the easily differentiated Space Wolf Grey mixed 50:50 with Contrast Medium. It was applied liberally but with the larger pooled areas brush stroked away. This seemed the best way of getting the desired effect without looking too 'contrasty'. On some of the larger panels I then added a bit of a watered down blue wash on the lower half, to add a bit of gradient, though again careful not to let it pool.


Skipping ahead several steps until most of the detail is done, the last addition to the armour (other than weathering and tidying up) was to go back with Wolf Grey (the regular paint one, not the spray one!) for some selective edge highlights.

And that's that. Here's a bunch more completed pictures, I do hope you like them, and you all stay safe.