Sunday, 13 February 2022

Learning Age of Sigmar Part One - Seraphon vs Chaos

Hello!

So I've labelled this one as a 'battle report', but it's not really, because I don't really know what I'm doing. Back in 2020 I painted up a bunch of Seraphon stuff to add to my existing pre-Age of Sigmar Lizardmen army, and since then I have yet to use them in battle - until now. I have decided that 2022 would be the year I finally get into actually playing AoS. Before this I did play a simple open play game on TTS to get my head around the basics - in that game I won based on a turn two double turn enabling my melee force to all charge my opponent's melee force. This game however would be a 2000 point matched play game, ramping up the complexity a fair bit. 


I was playing against Dargiris and his Slaves to Darkness force. I believe the scenario was called Savage Gains, basically four objectives in a diamond pattern, points for holding them etc etc.


The chaos forces had a couple of knight units, a big block of tough warriors, some chosen, a war shrine and an assortment of scary characters - most notably a daemon prince who had access to a load of auras to buff his guys and slow me down - halving charge moves over a wide area. Apart from one bonus character they all dropped in one go, which I believe is a pretty common sight in AoS.


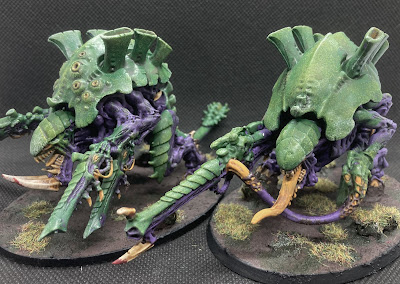
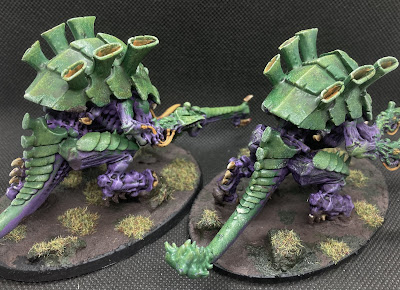
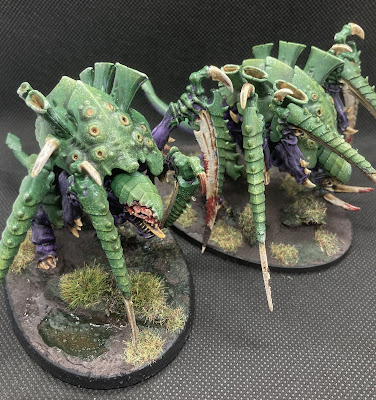
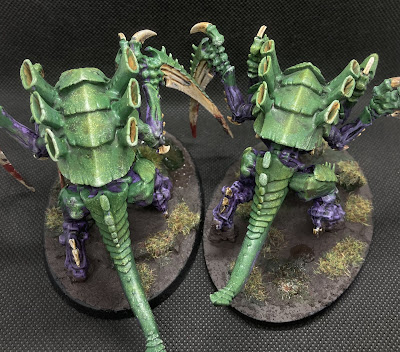
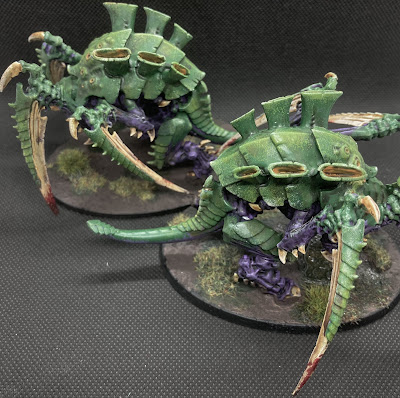
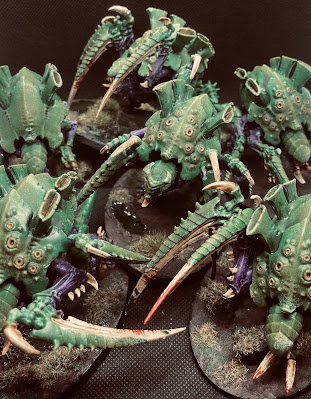
My force by contrast had a load of smaller units and many drops. Mostly Saurus based, I was running Coatl's Claw Coalesced as my sub faction choices which makes the lizards tougher, chompier and Saurus units better when they charge. An Oldblood on Carnosaur was set up to be the killiest thing, but I also had a Slaan and an Oracle on Troglodon for some magic and stuff.


I got the first turn and moved up to hold objectives. I tried to keep my most powerful units back a bit to be a counter attack and to protect them from the double turn. As we will see, this needs work.


The Chaos Knights came around on the flanks and engaged my Knights, and outclassing them. I did manage to deny one of the objectives due to having Saurus Warriors in range to outnumber the Knights, so at the end of turn one I was in the lead on points.


Then we rolled for priority, and it was time for a Chaos double turn! Everything moved up and most of it charged in.


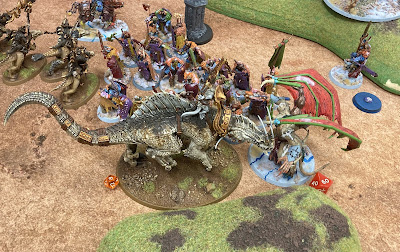
My cheaper screening units folded in short order, but thanks to some good movment by the Knights on the right flank and poor planning/rules knowledge by me, they were able to sneak round and engage my Saurus Guard, Slaan and importantly tag the Carnosaur. Because of AoS' 3 inch rule the big dinosaur was locked into combat, but because there was a building in the way, he was unable to get into range to actually fight. Similarly because of the coherency rules the Guard could only attack with two or three. Basically I'd made a right mess of that screening thing!


In my turn I wanted the Oldblood to power up and go fight the Daemon Prince, but he still got stuck within 3 inches. The Guard eventually worked their way through the Knights, but they were held back from getting a good charge and getting most of their number in thanks to the Prince's aura. The Carnosaur did manage to wreck the building that had frustrated it though!


Instead of combining with the other big dino, the Troglodon went into the Prince on it's own, and, predictably, got beat up pretty badly. My remaining Knights on the left flank did manage to chase off their Chaos counterparts, but they were staring down a big mob of Warriors, who rudely proceeded to tie them up with a follow up move so they were unable to charge and get extra damage on their spears.


After turn two the Chaos forces had lost their Knights but the solid centre was still very solid. They had also wracked up a sizable lead by keeping the objectives to themselves. Going into turn three Chaos went first again and scored for three objectives once more, pretty much putting me out of the game on points.


With the game gone, most of my models dead and my brain somewhat hurting, the Slaan called the retreat. Ironically I still had the Slaan, the Oldblood on Carnosaur and most of the Saurus Guard - probably my three most powerful units. They were just all tied up at the back and unable to influence the game. Chaos Victory!

With hindsight, given that holding my units back failed so badly, I probably should have shoved all my strong units up on one flank or something, to make sure I got value out of them. I was very scared of getting double-turned, which I was, but I think possibly in trying to account for that I just made it worse. This is definitely something important to learn - how to play to defend against it without conceding control of the battlefield. I also got severely caught out by the 3 inch rule - this is very different to 40k where if you're not within an inch, which is also the range in which you can attack, you are not locked in melee. I need to either keep my units further apart or deliberately keep them close together to support one another I think.

Ultimately, I'm not upset by a crushing defeat - as the title says this is a learning process. Aside from the importance of unit placement as stated above, the other thing to learn is, well, everything. All the uses of command points, all the unit and army special abilities I have, all the 'secondary objectives'. I'm less bothered about this fine detail compared with learning the general flow of the game and what you are 'supposed' to do, but it is something that will have to come with practice. I will say though that I might try and play a few non-matched play games before I try this again just to get my head around it a bit better - the complexity is a bit much to jump straight in. I'd heard a lot of people saying that AoS is a lot simpler than 40k, and I would now strongly disagree. It may have fewer stratagems and the like, but I think there are just as many weird unit abilities and combos to try and keep track of. Overall I'd say I like the feel of the game but it's definitely not just 40k without the complexity!

Anyway, hope this was in some way an interesting read, I'm sure there will be more somewhere down the road. Thanks for checking it out, and stay safe out there.

Friday, 11 February 2022

'Sponge Nid' Project Part Three - Carnifex Herd

Hello!

Part three of the spongey Nid project, and we're getting progressively larger. I started with all the little bugs, then moved up to the mid sized monsters, and now it's the Carnifex herd. Six of the living battering rams with assorted bio weapons. As before they were all painted with the sponge technique for the green to give a nice natural look.


Here's the shooty pair, fun to paint that big licky tongue and I think the guns work well with the kind of green to purple fade thing these guys have going on.


Next, a couple of melee fexes. These have magnets on their forelimbs so they can potentially be swapped out for new weapons at a later date - particularly relevant for the skull faced Old One Eye look alike. Also note - some water effect and lumpy bits on the bases.


And two more classic Screamer-Killer builds - note, more lumps and water on the bases.


Unsurprisingly they didn't all fit very well in the light box for a group shot - so here they are all clambering over each other to get at some tasty biomass. Next up will be a bunch of even bigger beasties, so look out for that!

Hope you enjoyed, thanks for looking, and stay safe.

Tuesday, 8 February 2022

Sponge Mini-tutorial - 'Sponge Nid' Project Part Two and a Half

Hello!

Just a quick one - I thought I'd do a bit of a mini tutorial on how I do my sponging, as seen on two Death Guard projects from last year, assorted other bits, and most recently the green and purple Tyranid commission. It's not a miracle method to instantly paint all models, but it is a fun alternative to drybrushing if you want a slightly less controlled and more textured look. I don't know if there are people out there who maybe don't know quite what I mean when I say I'm sponging something, or maybe there are those who just want a little persuasion to give it a go - either way here's a little run down of the method I use.


Here's the starting point for this miniature. Base colours are on and a bit of shading, ready for a highlight layer on that green. Note that you can easily do this the other way around - sponge on a lighter layer over a base coat and then apply a contrast paint or wash over for a more muted effect. In this case we are going to be sponging on some light green over the carapace etc.


Here's the sponge I'm using - it's about a quarter of a cheap sponge scourer from a Tesco multipack. As you can see I've loaded up a corner or edge with paint - much like drybrushing you can vary the amount depending on how strong of a highlight you want, I find there is usually a sweet spot that is a little bit wetter than an equivalent drybrushing would want. You can also see that I've used this bit of sponge before on the far side - you can use the same area once it's dried multiple times, eventually it'll clog up and become hard to use but you don't have to throw it away after each use.


Here's the actual sponging in action - simply dab the slightly wet sponge over the areas you want to highlight, applying more or less pressure depending on the desired effect. Too wet and too much pressure will just paint a big blob onto your model so you will want a certain amount of restraint, but with a bit of a dryer sponge you can really go ham at the model if you want! With these sponges the scourer pad also provides a nice easy bit to hold on to which is nice - I've used sections of packing foam instead to get smaller areas but it is a bit harder without a firm section to grip.


Here's the result after the green sections were sponged - I went back over once it was dry with a bone colour for another highlight layer with less paint on the sponge and a lighter touch. As you can see it produces a mottled, natural looking effect which really suits this kind of model. It also works great for chipped paint or flecks of rust etc.

I don't claim to be an expert by any means, but this is something I've been enjoying and it gives a nice effect, I definitely think it's worth giving a try, if only just to have another painting tool in the box. Hope you enjoyed this little guide, thanks for reading and stay safe.

Monday, 7 February 2022

Adeptus Titanicus Battle Report - The Fate of Esteban V

Hello!

It's another AdTit game against The Claw, concluding our little narrative campaign in which two traitor forces, Legio Mortis and Legio Magna, battle to control the forge world of Esteban V. While the Warmaster's attention has turned to the road to Terra, the two Legios sent forces to secure the spoils of worlds previously cleansed of loyalists. Magna lay claim to Esteban V, being close to their homeworld of Esteban VII (but not Esteban III, one time home of Legio Tempestus - there are a lot of Estebans in 40k!), while Mortis claim it due to status and seniority as one of the original Titan Legions. 

After their initial landing, Mortis forces soon encountered and engaged Magna at Gate 7, the entry to a huge underground manufactorum. Mortis took the site, but were unable to defend it against the Magna counter attack. A larger battle ensued in the desert flats below Gate 7, where Mortis were once again able to claim the ground. Magna struck back decisively though to take control of the Spaceport supplying the Manufactorum. With the fate of the planet in the balance, the two forces turned to the polar city of Bolsunder, the planet's last remaining population hub, to decide this war once and for all.

We decided to play a 2000 point, semi-matched play kind of scenario - we both took the primary objective to destroy the other player's most expensive model as soon as possible, with the secondary objective of controlling quarters of the board. We also had some points for stratagems each this time, and The Claw took a tertiary objective to get some bonus points for engine kills as one of them. My most notable pick was the Blind Barrage.


Legio Mortis forces included a Lupercal Light Maniple of three Warhounds and a Perpetua Battleline Maniple with a Warlord and two Reavers, one set up for melee and the other for armour busting ranged firepower. All three of my larger engines were Corrupted Titans for the first time. The Warlord had Corrupted Soul and Preternatural Regeneration to get a load more repair dice, the melee Reaver picked the Overwhelming Rage mutation for obvious reasons and had some Daemonic Bile to spit all over it's opponents, and the ranged Reaver took Warp Conduit so it could effectively smite something and grab the Empyrean Shroud for a -1 to hit at range. There were a few other upgrades here and there but that was most of it. I think the Perpetua maniple seems to go well with Corrupted Titans since it means emergency repairs always go off on a 2+ regardless of other command check modifiers, like the ones all Corrupted Titans get.


On the other side of the battlefield Magna fielded a Fortis Maniple once again, this time with two Warlords (including one double traitor - a salvaged and repurposed Mortis engine!) and two Reavers, all with an assortment of ranged weapons and some upgrades. They were accompanied by another banner of Knight Lancers - presumably not the same ones that got blasted to bits in turn one last time!


Deployment - the forces line up. It looked like the larger buildings on the left would be the focus of the fighting while the sparser right flank would be less contested. My Warlord was set up deliberately back a little from the front lines, I did not intend for it to move much and I expected it to weather most of the firepower coming it's way with all it's bonuses to repair rolls.


Turn one, the lighter Titans and Knights moved up - the Lancers hiding themselves from the Mortis Warlord's First Fire order! Magna took minor damage to the merged shields on their twin Warlords, while the Mortis one took a battering, losing it's shields and taking some heavy head damage already!


Turn two, operation protect the Warlord. I dropped the Blind Barrage on it while it Emergency Repaired to get shields back and lose some heat.


Elsewhere the Knights engaged the angry Reaver, taking minimal damage from it's swinging fists...


Then taking it out with lances and shield blows to the head! A huge explosion did more damage to the Knights than the Reaver did, as well as hurting the Magna Reaver behind! ENGINE KILL!


The Mortis Warhounds got a measure of revenge, downing the shields on the Titan and blasting it with Maximal fire Plasma, the blasts killing off a couple more Knights and destroying the Reaver! Good work Warhounds!


Going into turn three things were heating up, both sides losing a Reaver and both sides' Warlords had been taking heavy fire so shields were low - one of the Magna ones lost it's shields entirely due to a reactor overload - time to capitalise. My Warlord stripped the remaining shields, before the Warhounds on the left flank (the one on the right got destroyed by it's opposing Reaver) blasted into the target Titan, the Plasma nearly doing the job.


But return fire knocked out my Warlord! Felled for the first time on the surface of Esteban V, the death of the Mortis Princeps Senioris put Magna firmly in control.


However, my remaining Reaver was able to get a bead with the Melta Cannon around the blue building and finish off the damaged Magna Warlord to even the score - that meant both sides had destroyed the enemy target on turn three, so it was going to be a tight one!

Going into turn four I hid the Warhounds from the enemy Warlord and finished off the remaining Knight that was harrassing my Reaver - which took heavy firepower but since it was shrouded in psychic energy most of it missed.


Turn five, once again the Mortis engines hid from the Warlord and tried to focus down the enemy Reaver, to little effect thanks to the building shielding it. The Psychic Reaver once again avoided most of the damage, and then the game ended.

With both key targets destroyed in the same turn, and few units left to control the board, our primary and secondary objectives were a dead tie. However, Magna had a tertiary objective - the few extra points there for killing my engines was enough to give them a win by the tiniest of margins!

With that, the remaining Mortis forces withdrew to follow the call of the Warmaster. So Esteban V would be the realm of Legio Magna for the rest of the war, and perhaps now the two might put aside differences and bring their fury to bare on the Loyalists? 

This was definitely the closest game of Titanicus we've had, absolutely down to the final moments and a fitting finale. Obviously we both had a blast, plenty of classic Titanicus moments like explosions and machine spirits (or in this case daemonic entities) taking over, and as always the games look awesome. The Corrupted Titans are a lot of fun, but this time I was particularly impressed by my Warhounds, especially the always entertaining Plasma blast guns.

Anyway, that's it for our narrative, I hope you've enjoyed it! We definitely did and I think it served the purpose of helping us slowly learn and relearn the rules over the past two years! I'm sure there will be more AdTit down the line, but for now, thanks for reading, and stay safe out there.

Tuesday, 1 February 2022

Mozrog Skragbad, Big Chompa and da Killa Gnaw

Hello!

Recently I painted up a couple of big squigs and their riders that I got for Christmas. We've got the Snakebite big boss himself Mozrog Skragbad on the Great White Squig Big Chompa, and a Killa Gnaw from Kromlech -which will be counting as a Killa Kan. Both very appropriately Beast Snaggy to go with the latest wave of Orks from last year.


First lets look at the Gnaw - a cybork squig with a Grotzooka and drill, ridden by an enthusiastic Grot. This was a gift from a secret Santa from the Old Wolves discord group - obviously someone who knows I do like a big squig!


It wasn't just the Gnaw in the gift though - there was also this cute little pumpkin wearing squig! Spooky! I decided to stick it on the base with the bigger squig and keep them together.


Now with that out of the way, here's the big guy himself...


GW really smashed it out of the park with this one, such a fun model! Of course I could have built him as a generic Beast Boss and another Redtoof, probably the more powerful option, but I couldn't turn down the option of a Snakebite specific character. 


Big Chompa the squig got a combination of thinned down purple contrast and then some sponging highlights to give him a battered old sharky look. The sponge also got used for the chipped, rusty metals.


The citadel version of the mini has an amazing tribal tattoo on his shoulder which I don't have the skill to copy - plus it wouldn't show up so well on the darker skin I use for my Orks, so I gave him some red and white war paint instead. Hopefully you can see that it's supposed to be a snake with a couple of borders. 

Anyway, great fun couple of models, and hopefully I'll have a chance to put them on the table soon! Hope you enjoyed, thanks for reading, stay safe!